
Leather bags are an investment, and a Tumi bag is no exception. Seeing dirt, stains, or wear on your beloved Tumi leather bag can be frustrating. Fortunately, with the right techniques, you can restore its beauty and extend its lifespan. This guide will walk you through a comprehensive cleaning process, from quick spot treatments to deep cleaning methods, ensuring your Tumi leather bag stays looking its best for years to come. We’ll start with a quick fix for minor scuffs, then cover detailed cleaning, conditioning, and preventative measures.
Tumi leather is renowned for its durability and aesthetic appeal. However, it requires specific care to maintain its quality. This guide will provide you with everything you need to know to safely and effectively clean your Tumi leather bag, covering different leather types, stain removal, and long-term maintenance. By the end, you’ll be confident in your ability to keep your bag looking pristine and protect your investment.
Understanding Your Tumi Leather
Before diving into the cleaning process, it’s crucial to identify the type of leather your Tumi bag is made from. Tumi uses several different leather types, each requiring slightly different care.
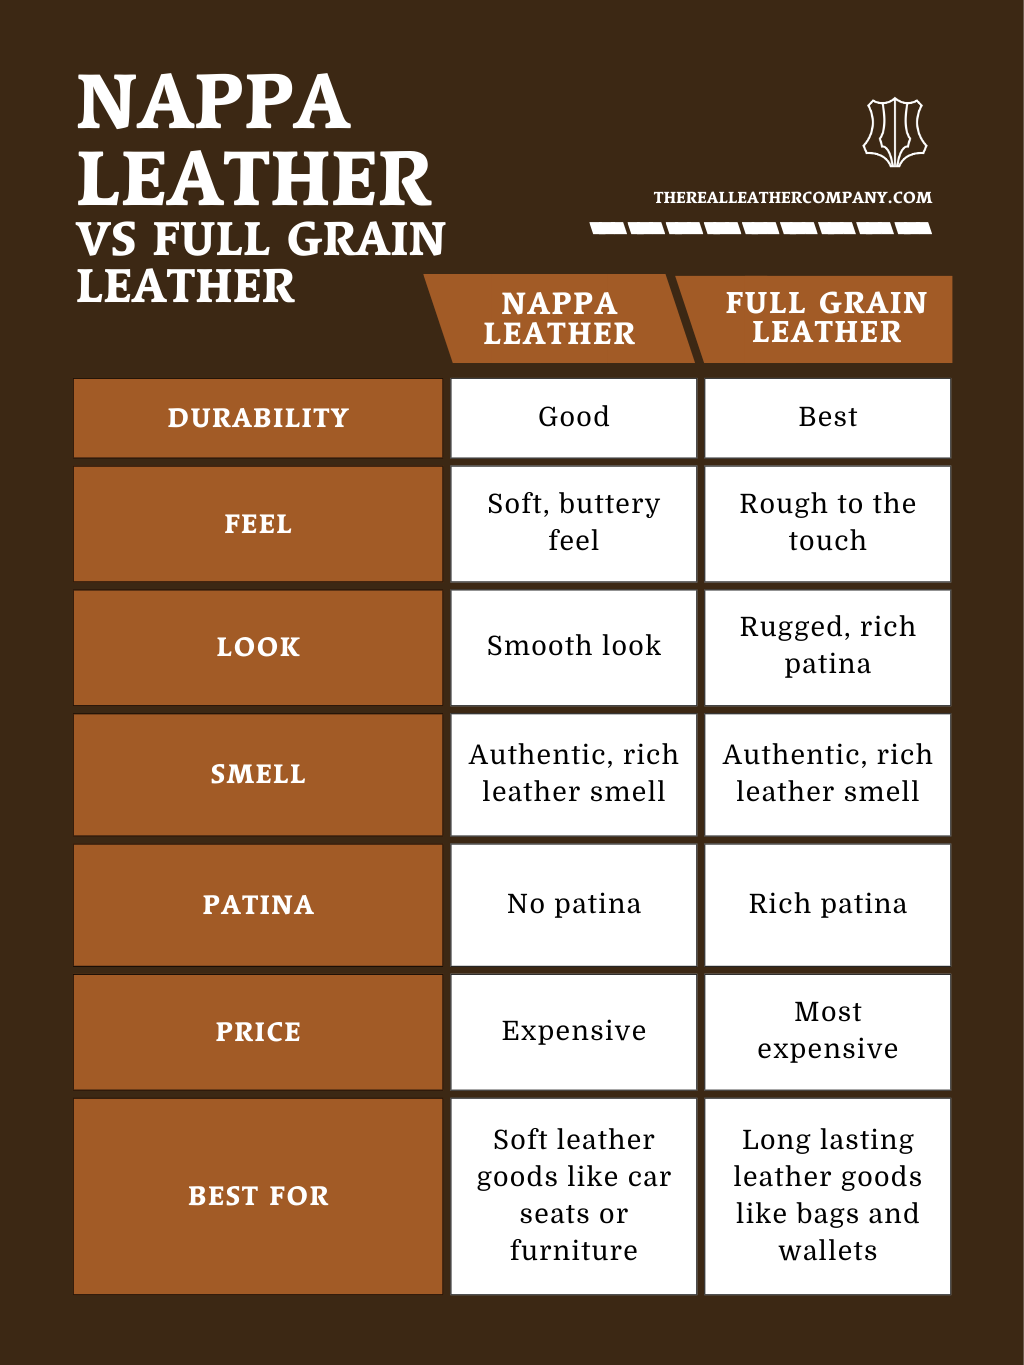
- Full-Grain Leather: The highest quality, most durable, and develops a rich patina over time. Requires regular conditioning.
- Top-Grain Leather: More affordable than full-grain, with a more uniform appearance. Still durable but less prone to patina development.
- Nappa Leather: Very soft and supple, often used for interiors. Requires gentle cleaning and conditioning.
- Coated Leather: Offers increased water resistance and durability. Easier to clean but may require specialized cleaners.
Check your bag’s care label or the Tumi website for specific leather type information. If unsure, test any cleaning product on a discreet area first.
Materials You’ll Need
- Soft Microfiber Cloths: Essential for gentle cleaning and buffing.
- Leather Cleaner: Specifically designed for leather. Avoid harsh chemicals or all-purpose cleaners. Lexol, Leather Honey, and Chamberlain’s Leather Milk are popular choices.
- Leather Conditioner: To replenish oils and prevent cracking. Use a conditioner compatible with your leather type.
- Saddle Soap (Optional): For deep cleaning and stubborn stains. Use sparingly.
- Distilled Water: For diluting cleaners or creating a gentle cleaning solution.
- Soft-Bristled Brush: For removing dirt from textured leather or seams.
- Leather Protector Spray (Optional): To add an extra layer of protection against water and stains.
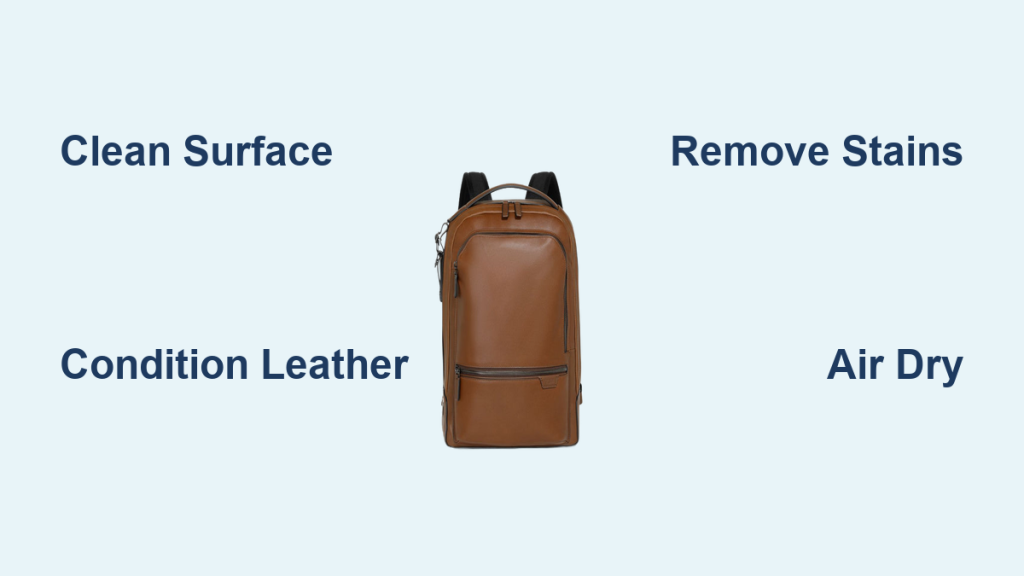
Step-by-Step Cleaning Process
Step 1: Initial Dusting and Surface Cleaning
Begin by removing loose dirt and debris.
- Use a soft, dry microfiber cloth to wipe down the entire bag, paying attention to seams and crevices.
- For textured leather, use a soft-bristled brush to gently dislodge dirt.
- Empty all pockets and compartments. Turn the bag inside out to shake out any lingering debris.
Step 2: Spot Cleaning
Address any visible stains or marks.
- For minor scuffs: Gently rub the area with a clean microfiber cloth. Often, this is enough to buff them out.
- For water stains: Allow the bag to air dry completely. Then, gently rub the area with a clean, damp cloth.
- For oil-based stains: Sprinkle cornstarch or talcum powder onto the stain and let it sit for several hours. Vacuum or brush off the powder. Repeat if necessary.
Step 3: Deep Cleaning (For Overall Soiling)
For a more thorough clean, follow these steps:
- Prepare the cleaner: Dilute the leather cleaner according to the manufacturer’s instructions.
- Apply the cleaner: Dampen a clean microfiber cloth with the diluted cleaner. Do not saturate the cloth.
- Gentle application: Gently wipe the leather surface in circular motions. Avoid applying excessive pressure.
- Wipe away residue: Use a clean, damp microfiber cloth to wipe away any remaining cleaner residue.
- Air dry: Allow the bag to air dry completely, away from direct sunlight or heat.
Step 4: Conditioning the Leather
After cleaning, it’s crucial to condition the leather to restore its moisture and prevent cracking.
- Apply the conditioner: Apply a small amount of leather conditioner to a clean microfiber cloth.
- Even distribution: Gently rub the conditioner onto the leather in circular motions, ensuring even coverage.
- Allow absorption: Let the conditioner absorb into the leather for 15-30 minutes.
- Buff the leather: Use a clean, dry microfiber cloth to buff the leather, removing any excess conditioner.
Dealing with Specific Stains
:max_bytes(150000):strip_icc()/remove-ink-from-leather-6274276-final-f12c4b70fe2c43279a8e45dcb3ce661b.png)
- Ink Stains: Use a leather-safe ink remover specifically designed for leather. Test in an inconspicuous area first.
- Grease Stains: As mentioned above, cornstarch or talcum powder can absorb grease. For stubborn stains, consult a professional leather cleaner.
- Mold/Mildew: Mix equal parts distilled water and rubbing alcohol. Dampen a cloth with the solution and gently wipe the affected area. Allow to air dry completely.
- Dark Marks/Color Transfer: A professional leather cleaner is often the best solution for removing dark marks or color transfer.
Pro Tips for Tumi Leather Care
- Regular Dusting: Make dusting part of your routine to prevent dirt buildup.
- Immediate Stain Treatment: Address stains as soon as possible for easier removal.
- Avoid Overexposure to Sunlight: Prolonged sun exposure can fade and dry out the leather.
- Store Properly: When not in use, store your Tumi bag in a dust bag in a cool, dry place. Avoid plastic bags, which can trap moisture.
- Rotate Your Bags: If you have multiple leather bags, rotate their use to prevent excessive wear on any single bag.
- Waterproofing: Consider a leather protector spray to increase water resistance, especially if you live in a wet climate.
When to Seek Professional Help
- Severe Stains: If you’ve tried multiple methods and a stain persists, consult a professional leather cleaner.
- Significant Damage: Cracks, tears, or major discoloration require professional repair.
- Unsure Leather Type: If you’re unsure of your bag’s leather type, it’s best to seek professional advice to avoid damaging it.
- Loss of Shape: If your bag has lost its shape, a professional can help restore it.
FAQ
Q: Can I use baby wipes to clean my Tumi leather bag?
A: While convenient, baby wipes often contain chemicals that can damage leather over time. It’s best to use a dedicated leather cleaner.
Q: How often should I condition my Tumi leather bag?
A: Depending on usage, condition your bag every 3-6 months, or more often if it’s exposed to harsh conditions.
Q: Can I use a hairdryer to speed up the drying process?
A: Avoid using a hairdryer or any direct heat source, as this can dry out and crack the leather. Allow it to air dry naturally.
Q: Is it safe to use saddle soap on all types of Tumi leather?
A: Saddle soap can be harsh. Use it sparingly and only on full-grain or top-grain leather. Always test in an inconspicuous area first.
Keep Your Tumi Leather Bag Looking Its Best
By following these steps, you can effectively clean, condition, and protect your Tumi leather bag, ensuring it remains a stylish and reliable companion for years to come. Remember that regular maintenance is key to preserving the beauty and durability of your investment.
Have you tried these cleaning methods on your Tumi bag? Share your results and any additional tips in the comments below! Let’s help each other keep our Tumi bags looking fantastic.


