
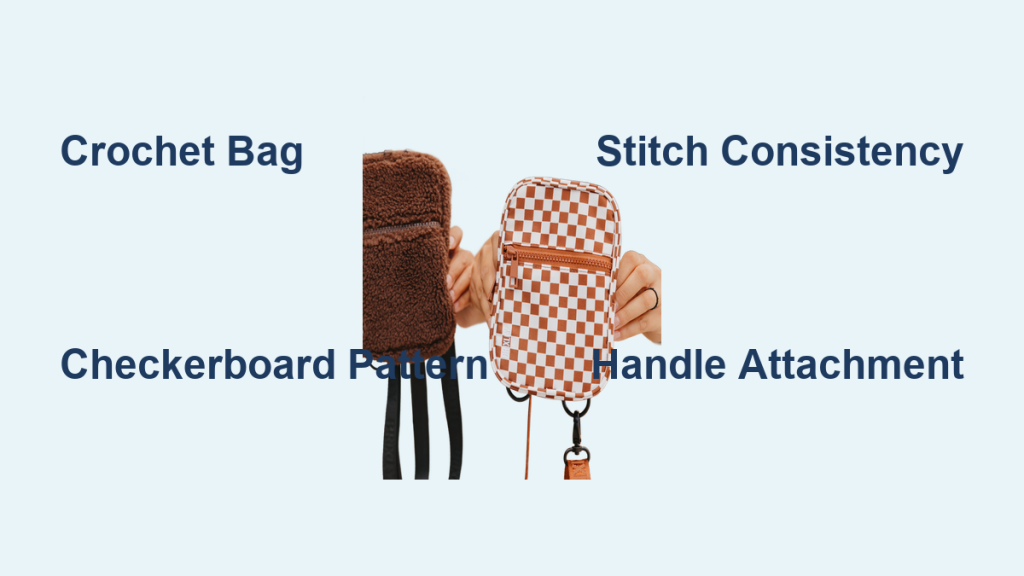
Are you dreaming of a stylish, handmade bag to carry all your essentials? A checkered crochet bag is a trendy and rewarding project, but the seemingly complex pattern can be daunting. Don’t worry! This guide will walk you through creating a beautiful checkered bag, starting with a simple foundation and progressing to the finishing touches. We’ll even cover a quick fix for uneven checkerboard rows right upfront.
This comprehensive guide will cover everything from choosing the right yarn and hook to mastering the basic stitches and assembling your finished bag. We’ll explore different checkerboard techniques, handle common issues, and provide pro tips to ensure your bag turns out perfectly. By the end of this article, you’ll have the confidence and knowledge to crochet a stunning checkered bag you’ll be proud to show off.
Materials and Tools Needed
| Item | Quantity | Specifications |
|---|---|---|
| Yarn (Color A) | 200-300 yards | Worsted weight cotton or acrylic |
| Yarn (Color B) | 200-300 yards | Worsted weight cotton or acrylic (contrasting color) |
| Crochet Hook | 5.0 mm (H/8) | |
| Yarn Needle | 1 | For weaving in ends |
| Scissors | 1 | |
| Stitch Markers | 6-8 | Optional, but helpful |
| Bag Handles | 2 | Prefabricated or crochet your own |
| Measuring Tape | 1 | To ensure correct size |
Understanding the Checkerboard Crochet Technique

The foundation of a checkered bag lies in creating a repeating pattern of two colors. There are a couple of common methods:
- Two-Row Stripe Method: This is the simplest method, working two rows of Color A followed by two rows of Color B, and repeating. It’s excellent for beginners.
- Row-by-Row Color Change: Changing colors at the end of each row creates a more defined checkerboard look. This requires carrying the unused yarn along the edge.
- Corner-to-Corner (C2C) Method: A more advanced technique that builds the checkerboard diagonally. We won’t cover C2C in detail here, but it’s an option for experienced crocheters.
We’ll focus on the Two-Row Stripe Method for this guide, as it’s the most beginner-friendly.
Step-by-Step Crochet Process
Phase 1: Creating the Bag Base
- Chain: Chain 25 (adjust for desired bag width). This is your foundation chain.
- Row 1 (Color A): Single crochet (sc) in the second chain from the hook and in each chain across. Turn. (24 sc)
- Row 2 (Color A): Ch 1, sc in each stitch across. Turn. (24 sc)
- Row 3 (Color B): Ch 1, sc in each stitch across. Turn. (24 sc)
- Row 4 (Color B): Ch 1, sc in each stitch across. Turn. (24 sc)
- Repeat Rows 1-4: Continue repeating these four rows (two rows of Color A, two rows of Color B) until your piece reaches the desired height for your bag base. For a standard bag, aim for around 12-16 inches. Ensure your checkerboard remains consistent; use stitch markers at the beginning and end of each row to track.
Phase 2: Shaping the Bag Sides
- Reduce Stitches (Color A): To begin shaping the sides, reduce stitches gradually. On Row 1 (Color A), sc in the first stitch, then skip the next stitch, sc in the following stitch. Repeat from * to * across the row. Turn. (Approximately 18-20 sc)
- Continue Reducing: Repeat Row 1 from Phase 2 on the next two rows (Color A and Color B). This will create a slight curve to the sides of your bag.
- Repeat Reduction Rows: Continue repeating reduction rows (alternating colors) until you’ve reduced enough stitches to create the desired bag shape. The number of reduction rows will depend on the original width of your base and how much curvature you want.
Phase 3: Finishing the Bag Top
- Final Rows: Crochet several rows (alternating colors) without any reductions to create a neat, finished edge.
- Fasten Off: Cut the yarn, leaving a tail for weaving in.
Phase 4: Assembling the Bag
- Seaming the Sides: Fold the bag in half, with the right sides facing each other. Use a yarn needle and yarn in a coordinating color to seam the sides together. A whip stitch or mattress stitch works well.
- Attaching Handles: Attach the bag handles to the top of the bag, ensuring they are securely fastened. You can crochet loops around the handles and through the bag’s fabric for extra security.
- Weaving in Ends: Carefully weave in all loose yarn ends to create a clean finish.
Common Issues and Troubleshooting
- Uneven Checkerboard Rows: If your checkerboard pattern becomes skewed, it’s likely due to inconsistent tension or missed stitches. Count your stitches in each row to ensure accuracy. If you notice an error, carefully unravel back to the mistake and correct it.
- Curved Sides: If the sides curve too much, you may have reduced stitches too aggressively. Reduce fewer stitches per row or add additional rows without reductions.
- Lumpy Seams: Ensure your tension is even when seaming the sides. A mattress stitch creates a flatter, more professional look.
- Handles Coming Loose: Reinforce the handle attachment by crocheting multiple loops around the handles and through the bag fabric.
Pro Tips for a Perfect Checkered Bag
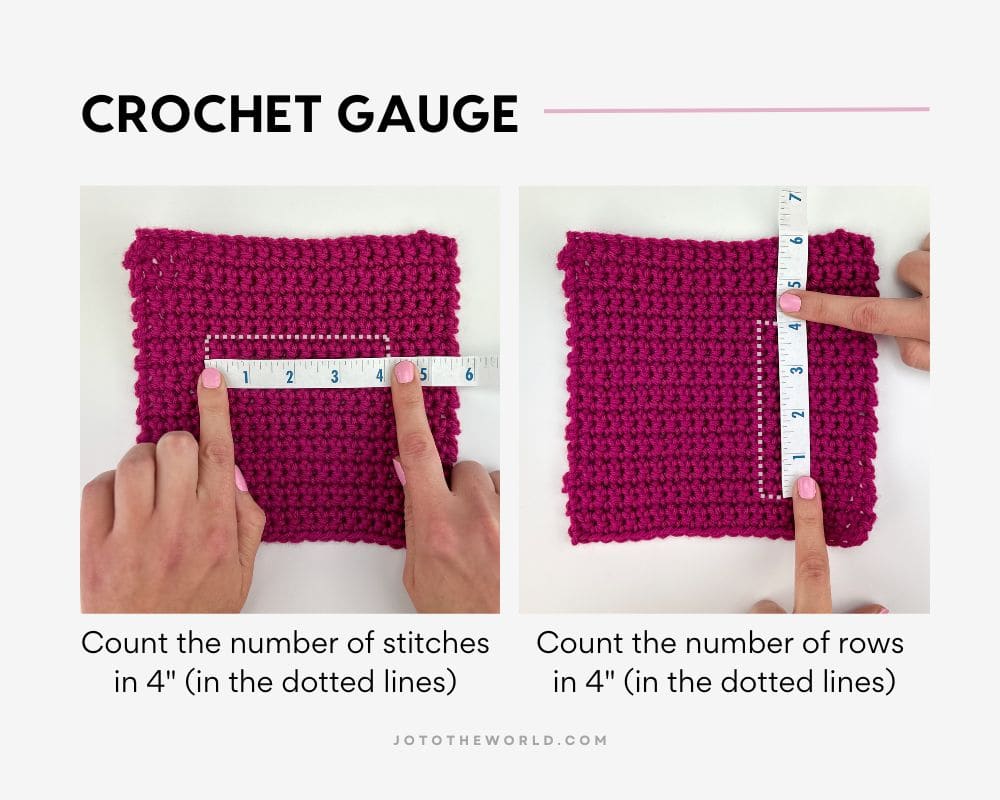
- Tension Control: Maintaining consistent tension is crucial for a neat checkerboard pattern. Practice your single crochet stitch before starting.
- Color Choice: Choose contrasting colors that complement each other. Consider the season and your personal style.
- Blocking: Blocking your finished bag can help even out the stitches and create a more polished look.
- Lining: Adding a fabric lining will give your bag more structure and protect your belongings.
- Experiment with Stitches: Once you’re comfortable with the basic checkerboard technique, try experimenting with different crochet stitches, like half double crochet or double crochet.
- Carry Yarn: To avoid excess weaving in ends, carry the yarn you aren’t using up the side.
Professional Help
If you’re struggling with a particular step or experiencing significant issues, consider seeking help from:
- Local Yarn Store: Many yarn stores offer crochet classes or one-on-one assistance.
- Online Crochet Communities: Join online crochet forums or Facebook groups to ask questions and share your progress.
- Experienced Crocheter: Ask a friend or family member who is proficient in crochet for help.
Typical cost for a crochet class might range from $20-50 per session.
FAQ
Q: Can I use different yarn weights?
A: Yes, but you’ll need to adjust your hook size accordingly. Using a heavier yarn will result in a larger bag, while a lighter yarn will create a smaller bag.
Q: How can I make a larger bag?
A: Increase the number of chains in your foundation chain and the number of rows you crochet.
Q: What if I want to add a closure to my bag?
A: You can add a button and loop closure, a drawstring, or a magnetic snap.
Q: Can I crochet my own handles?
A: Absolutely! There are many tutorials available online for crocheting bag handles.
Alternative Solutions
If the single crochet checkerboard isn’t your style, consider:
| Solution | Pros | Cons | Best For |
|---|---|---|---|
| Tunisian Crochet Checkerboard | Creates a dense, textured fabric | Can be more challenging for beginners | Those seeking a unique look |
| Mosaic Crochet Checkerboard | Visually striking, uses minimal yarn | Requires careful counting and color changes | Experienced crocheters |
Enjoy Your New Checkered Bag!
Congratulations on completing your checkered crochet bag! You’ve successfully navigated the steps, overcome potential challenges, and created a beautiful, handmade accessory.
Here’s a quick recap:
* We covered materials, tools, and the Two-Row Stripe method.
* We walked through creating the base, shaping the sides, and finishing the top.
* We tackled common issues and provided pro tips for a perfect finish.
Don’t be afraid to experiment with different colors, stitch patterns, and embellishments to create a truly unique bag.
Share a picture of your finished bag in the comments below! We’d love to see your creations and hear about your experience.


