
Are you tired of digging through your tote bag and finding a chaotic mess? Do you wish your belongings had a dedicated, protected space within your larger bag? Sewing a bag liner is the perfect solution! This simple project adds organization and a polished look to any tote, backpack, or even a basket. A quick fix is to simply use a zippered pouch, but this guide will show you how to create a custom-fit liner that truly transforms your bag.
This comprehensive guide will walk you through every step of sewing a bag liner, from choosing the right fabric and taking accurate measurements to constructing a professional-looking finish. We’ll cover different liner styles, including simple slip-in liners, zippered liners, and those with pockets. By the end of this article, you’ll be equipped to create beautiful, functional bag liners tailored to your specific needs and bag sizes.
Materials and Tools Needed
| Item | Quantity | Specifications |
|---|---|---|
| Fabric | Varies (see section below) | Cotton, linen, quilting cotton, or waterproof PUL |
| Interfacing (Optional) | Varies | Lightweight fusible interfacing for added structure |
| Zipper (Optional) | 1 | Length slightly shorter than the bag’s opening |
| Thread | 1 spool | Matching fabric color |
| Scissors or Rotary Cutter | 1 | Fabric cutting |
| Ruler or Measuring Tape | 1 | Accurate measurements |
| Pins or Clips | Plenty | Securing fabric layers |
| Sewing Machine | 1 | Standard sewing machine |
| Iron & Ironing Board | 1 | Pressing seams |
| Seam Ripper | 1 | For correcting mistakes |
Choosing the Right Fabric
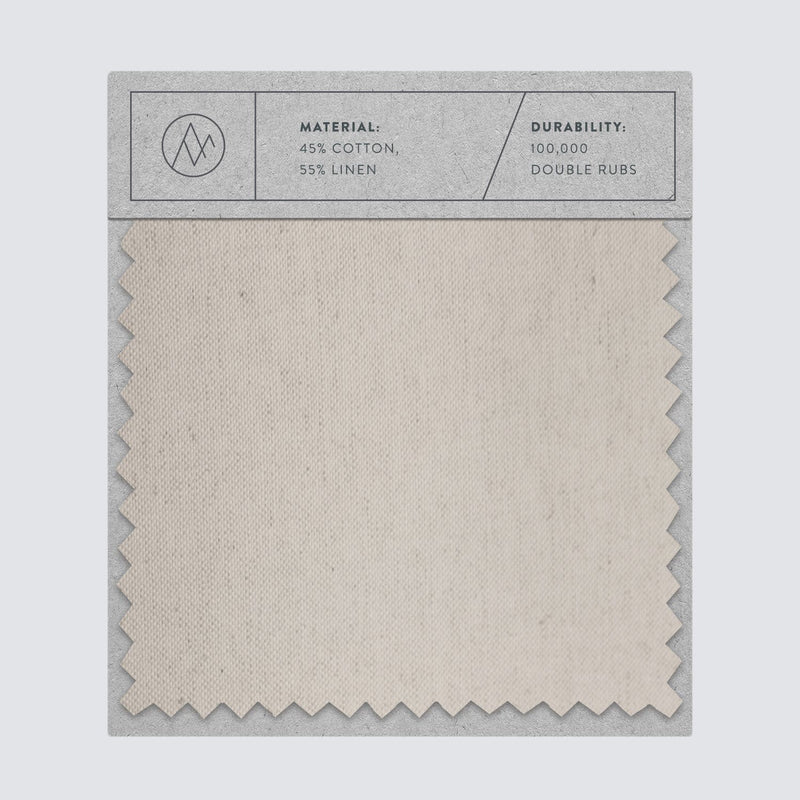
The fabric you choose will impact the liner’s functionality and appearance. Here are some popular options:
- Cotton: Breathable, easy to work with, and available in countless colors and patterns. Ideal for everyday use.
- Linen: Durable, lightweight, and has a beautiful texture. A more sophisticated look.
- Quilting Cotton: Offers a wide range of prints and is easy to sew. Good for adding a decorative touch.
- Waterproof PUL (Polyurethane Laminate): Excellent for protecting against spills and moisture. Perfect for gym bags, diaper bags, or travel totes.
- Ripstop Nylon: Lightweight and durable, often used for travel and outdoor applications.
Consider the bag’s intended use when selecting your fabric. For delicate items, a smoother fabric like cotton or satin is best. For heavier items or protection from spills, PUL or a heavier canvas is a good choice. Interfacing can add structure, particularly for larger bags or thinner fabrics.
Taking Accurate Measurements

Precise measurements are crucial for a well-fitting liner.
- Width: Measure the inside width of your bag at the widest point.
- Height: Measure the inside height of your bag from the bottom to the top edge.
- Depth: Measure the inside depth of your bag from side to side at the bottom.
- Add Seam Allowance: Add 1/2 inch (1.3 cm) to all measurements for seam allowances. This will ensure a comfortable fit.
For example, if your bag measures 12″ wide, 15″ high, and 6″ deep, your fabric cutting measurements will be 13″ wide, 16″ high, and 7″ deep.
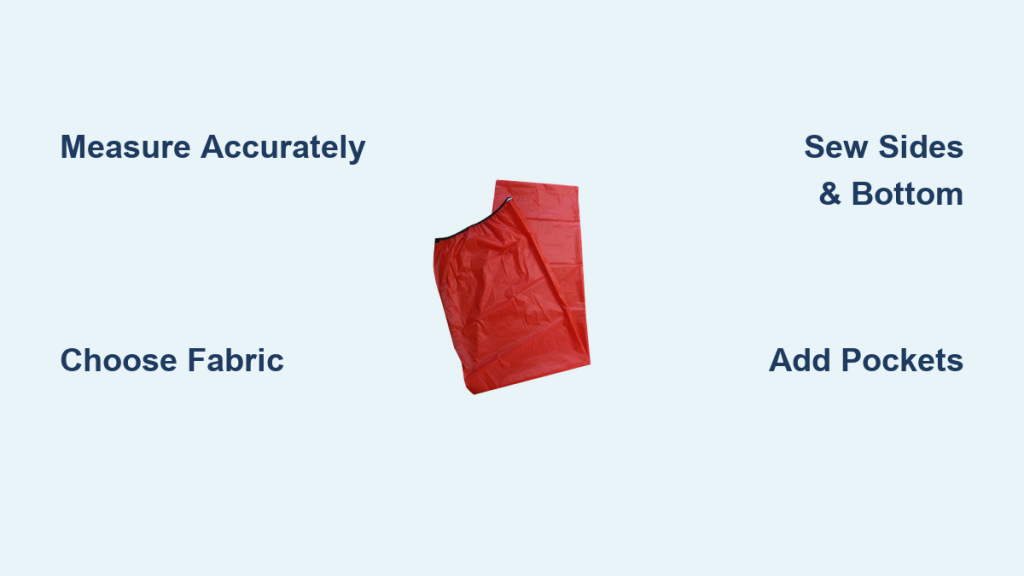
Step-by-Step Liner Construction: Simple Slip-In Liner
This is the easiest type of liner to make, perfect for beginners.
Phase 1: Cutting the Fabric
- Cut two pieces of fabric (and interfacing, if using) according to your calculated measurements.
- If using interfacing, fuse it to the wrong side of one of the fabric pieces.
Phase 2: Sewing the Sides
- Place the fabric pieces right sides together.
- Pin or clip the sides and bottom edges together, leaving the top open.
- Sew along the pinned edges with a 1/2 inch seam allowance. Backstitch at the beginning and end of each seam to secure the stitches.
Phase 3: Finishing the Edges
- Trim the seam allowances to 1/4 inch.
- Press the seams open.
- Finish the raw edges with a zigzag stitch, serger, or bias tape to prevent fraying.
Phase 4: Turning and Pressing
- Turn the liner right side out.
- Gently push out the corners.
- Press the liner flat, ensuring a crisp finish.
Step-by-Step Liner Construction: Zippered Liner
A zippered liner offers extra security and keeps belongings contained.
Phase 1: Preparing the Zipper
- Cut a piece of fabric slightly longer than the bag opening’s width.
- Place the zipper right side down along one long edge of the fabric.
- Pin or clip in place.
- Sew the zipper to the fabric using a zipper foot.
Phase 2: Attaching the Liner Panels
- Cut two fabric pieces as described in the Slip-in Liner instructions.
- Place one fabric piece right side to the zipper. Pin or clip in place.
- Repeat with the second fabric piece on the opposite side of the zipper.
- Sew along the pinned edges.
Phase 3: Finishing and Turning
- Sew the side and bottom seams as described in the Slip-in Liner instructions.
- Trim seam allowances and finish raw edges.
- Turn the liner right side out through the zipper opening.
- Press the liner flat.
Adding Pockets (Optional)
Pockets add extra organization to your liner.
- Cut fabric for the pocket(s) to your desired size.
- Fold over the top edge of the pocket piece and press.
- Fold over again and stitch to create a finished edge.
- Pin or clip the pocket(s) to the inside of one of the liner panels before sewing the liner together.
- Stitch the pocket(s) securely to the liner panel.
Pro Tips
- Pre-wash your fabric: This prevents shrinkage after the liner is sewn.
- Use a walking foot: A walking foot helps feed multiple layers of fabric evenly, especially when working with thicker fabrics or interfacing.
- Corner clipping: Carefully clip the corners of the liner before turning it right side out. This reduces bulk and creates sharper corners. Be careful not to cut through the stitches!
- Topstitching: Topstitching along the top edge of the liner adds a professional finish and prevents the fabric from stretching.
- Coordinate fabrics: Choose fabrics that complement your bag’s exterior for a cohesive look.
When to Seek Professional Help
If you’re struggling with a complex pattern, working with difficult fabrics, or simply don’t have the time, consider asking a local seamstress for assistance. They can create a custom liner to your exact specifications.
FAQ
Q: What fabric is best for a waterproof liner?
A: Waterproof PUL (Polyurethane Laminate) is the best choice for a completely waterproof liner. It’s designed to repel liquids and is easy to clean.
Q: Can I use felt for a bag liner?
A: While you can use felt, it’s not ideal. Felt tends to pill and doesn’t hold its shape as well as woven fabrics.
Q: How do I measure a bag that isn’t a simple rectangle?
A: Take multiple measurements at different points and average them out. Focus on the widest and tallest points for the most accurate fit.
Q: My liner is too tight. What did I do wrong?
A: You likely didn’t add enough seam allowance to your measurements. Remember to add 1/2 inch to all dimensions.
Alternative Solutions
If sewing isn’t your thing, consider using pre-made fabric boxes or organizers that fit inside your bag. These are readily available online and in stores, but they may not offer the same custom fit as a sewn liner.
Keep Your Bag Organized
Congratulations! You’ve successfully sewn a bag liner. Now you can enjoy a tidy and organized bag, knowing your belongings are protected and easily accessible.
Here’s a quick recap of what you’ve learned:
- Choosing the right fabric for your needs
- Accurate measurement techniques
- Step-by-step instructions for both simple and zippered liners
- Adding pockets for extra organization
Don’t hesitate to experiment with different fabrics, patterns, and features to create liners that perfectly suit your style and needs. Have you made a bag liner? Share your creations and tips in the comments below! We’d love to see what you’ve made.


