
Are you tired of lugging your gym clothes and shoes in plastic bags? Or maybe you need a durable bag for soccer practice? Sewing your own sports bag is a rewarding project that allows you to customize size, fabric, and features to perfectly suit your needs. This guide will walk you through the process, starting with a quick method for a simple drawstring bag, and then progressing to a more robust, zippered sports bag construction.
This comprehensive guide will take you step-by-step through creating a functional and stylish sports bag. We’ll cover fabric choices, necessary tools, pattern options, and detailed sewing instructions, even troubleshooting common issues. By the end of this article, you’ll have the confidence and skills to create a sports bag that’s built to last.
Materials and Tools Needed
| Item | Quantity | Specifications |
|---|---|---|
| Fabric (Outer) | 1.5 – 2 yards | Durable, water-resistant fabric like nylon, canvas, or ripstop. |
| Fabric (Lining) | 1.5 – 2 yards | Lightweight fabric like quilting cotton or nylon lining. |
| Interfacing | 1 yard | Fusible interfacing for structure (medium-weight). |
| Zipper | 18-24 inch | Heavy-duty nylon zipper for the main compartment. |
| Drawstring/Cord | 3-4 yards | Paracord, nylon cord, or similar. |
| Webbing | 2 yards | 1-inch wide webbing for straps. |
| D-Rings | 2 | For adjustable straps. |
| Swivel Hook | 1 | For attaching straps. |
| Thread | 1 spool | Heavy-duty thread matching your fabric. |
| Sewing Machine | 1 | With a zipper foot. |
| Fabric Scissors | 1 | Sharp scissors for cutting fabric. |
| Pins | 1 box | For holding fabric layers together. |
| Measuring Tape | 1 | For accurate measurements. |
| Iron | 1 | For fusing interfacing. |
| Seam Ripper | 1 | For correcting mistakes. |
| Chalk or Fabric Marker | 1 | For marking fabric. |
Choosing a Pattern & Preparing Your Fabric
There are many free and paid patterns available online for sports bags. Search for “free sports bag sewing pattern” to find options. For this guide, we’ll focus on a versatile rectangular bag with a zippered top and adjustable shoulder straps. Alternatively, you can draft your own pattern based on your desired dimensions.
Preparing Your Fabric:
- Wash and dry your fabric: This prevents shrinkage after the bag is sewn.
- Iron the fabric: Remove any wrinkles for accurate cutting.
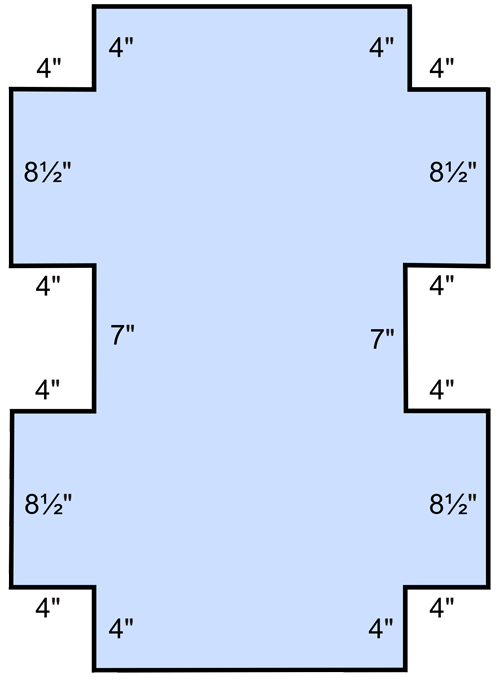
- Cut out pattern pieces: Carefully cut out all pattern pieces from your chosen fabric, lining, and interfacing. Remember to add seam allowances (typically 1/2 inch) unless the pattern specifies otherwise.
- Fuse interfacing: Apply fusible interfacing to the outer fabric pieces to provide structure and stability. Follow the manufacturer’s instructions for fusing.
Step-by-Step Bag Construction
Phase 1: Preparing the Bag Body
- Assemble Outer Fabric Panels: Sew the outer fabric panels together to form the main bag body. Right sides together, using a 1/2 inch seam allowance. Press seams open.
- Assemble Lining Panels: Repeat the process for the lining panels. Leave a 6-8 inch opening in the bottom seam for turning the bag right side out.
- Box the Corners (Optional): To give the bag a more defined shape, box the corners. Measure and mark a square at each bottom corner. Sew across the square, then trim the excess fabric, leaving a 1/2 inch seam allowance.
Phase 2: Installing the Zipper
- Prepare Zipper Placement: Place the zipper face down along the top edge of the outer fabric, right sides together.
- Sew the Zipper: Using a zipper foot, sew the zipper to the outer fabric. Repeat for the lining fabric, ensuring the zipper is aligned.
- Topstitch the Zipper: Topstitch along both sides of the zipper for added durability and a professional finish.
Phase 3: Attaching the Straps

- Prepare Webbing: Cut two lengths of webbing for the shoulder straps. The length will determine how long the straps are.
- Attach D-Rings: Fold the webbing in half and attach a D-ring to the folded end. Secure with a box stitch.
- Attach Straps to Bag: Position the straps on either side of the bag opening. Pin securely and sew in place with a strong stitch, reinforcing the attachment points.
- Attach Swivel Hook: Attach the swivel hook to the remaining end of one strap to create an adjustable strap.
Phase 4: Finishing Touches
- Turn Bag Right Side Out: Carefully turn the bag right side out through the opening left in the lining.
- Close the Opening: Hand-stitch the opening in the lining closed using a blind stitch.
- Press the Bag: Press the bag to remove any wrinkles and give it a polished look.
- Add Internal Pockets (Optional): Sew in small pockets inside the bag for organizing smaller items.
Pro Tips
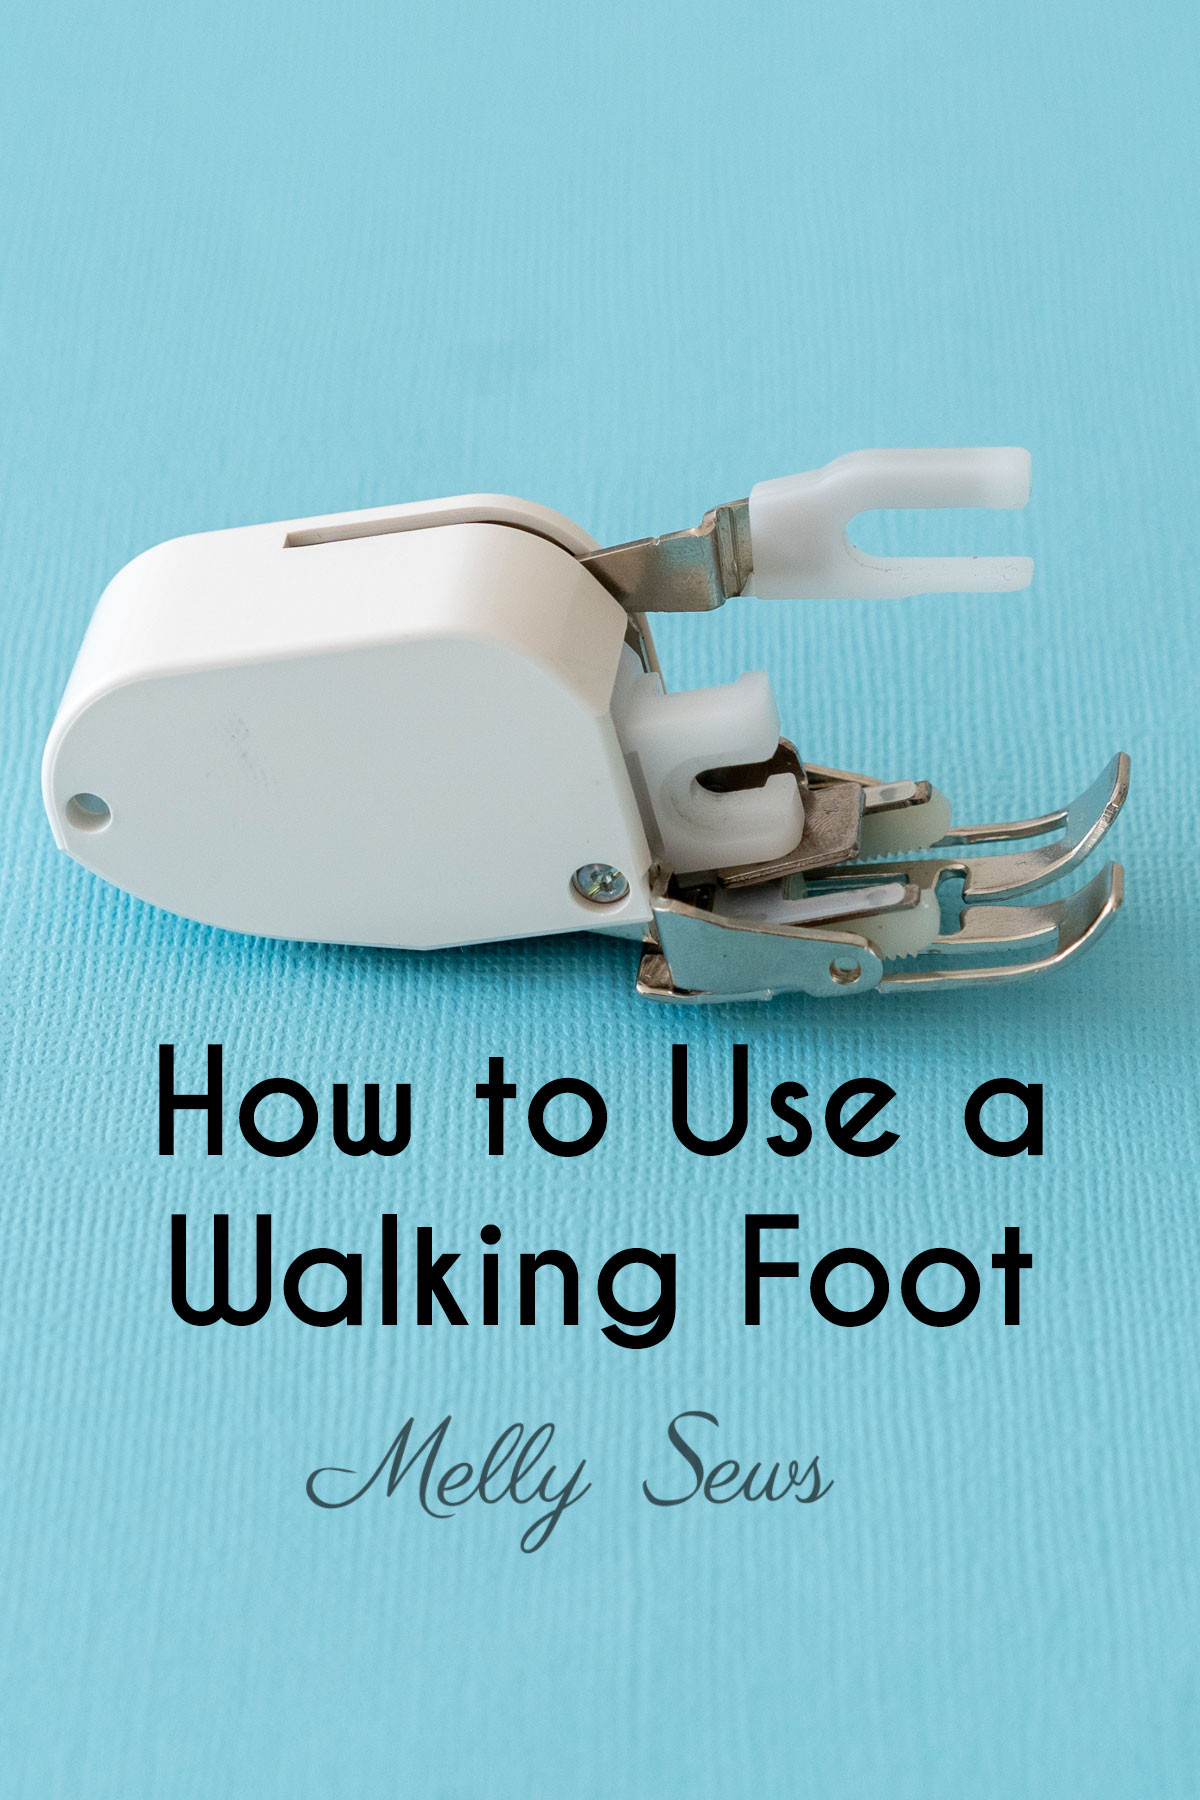
- Use a walking foot: A walking foot helps feed multiple layers of fabric evenly, especially useful with thicker materials.
- Reinforce stress points: Strengthen seams at the strap attachment points and corners with extra stitching.
- Waterproof your bag: Apply a fabric waterproofing spray to the outer fabric for added water resistance.
- Customize with patches or embroidery: Personalize your bag with iron-on patches or embroidered designs.
- Consider adding a key clip: A small carabiner or key clip inside the bag can be a convenient addition.
- Practice your zipper installation: Practice sewing zippers on scrap fabric before working on the bag.
- Pre-wind your bobbin: This saves time and frustration during sewing.
Professional Help
If you’re struggling with a particular step, or if you don’t have access to a sewing machine, consider seeking help from a local seamstress or tailor. A professional can ensure a clean finish and provide expert advice. The cost will vary depending on the complexity of the bag and the seamstress’s rates, but expect to pay between $50-$150 for alterations or complete construction.
FAQ
Q: What type of fabric is best for a sports bag?
A: Durable, water-resistant fabrics like nylon, canvas, or ripstop are ideal. They can withstand wear and tear and protect your belongings from the elements.
Q: Can I use a regular zipper?
A: While you can, a heavy-duty nylon zipper is recommended for sports bags as it’s more durable and can handle frequent use.
Q: How do I adjust the shoulder straps?
A: The D-rings and swivel hook allow you to adjust the length of the straps to your desired comfort level.
Q: My zipper keeps getting stuck. What can I do?
A: Make sure the zipper teeth are aligned and free of fabric. You can also apply a small amount of zipper lubricant to the teeth.
Alternative Solutions
If you’re not comfortable sewing a zippered bag, consider a simple drawstring closure. This eliminates the need for a zipper and simplifies the construction process. Alternatively, you could purchase a pre-made bag base and sew your own outer fabric and straps onto it.
| Solution | Pros | Cons | Best For |
|---|---|---|---|
| Drawstring Bag | Easier to sew, fewer materials | Less secure, not ideal for valuables | Quick gym visits, carrying lightweight items |
| Pre-made Bag Base | Saves time, ensures a professional shape | Limited customization options | Beginners, those short on time |
Get Your Sports Bag Working for You!
You’ve now learned the steps to create a durable and stylish sports bag. Remember to choose quality materials, take your time with the construction, and don’t be afraid to personalize your bag.
Ready to start sewing? Share your sports bag creations with us in the comments below! We’d love to see your unique designs.


