
Are you tired of flimsy plastic bags or bulky backpacks for carrying your books? Learning how to sew a book bag is a fantastic way to create a durable, personalized, and stylish solution. A simple sewn book bag can be completed in an afternoon, offering a quick fix for your book-toting needs.
This comprehensive guide will take you through the entire process of sewing a book bag, from gathering your materials to adding the finishing touches. We’ll cover several construction methods, including options for beginners and those with a bit more sewing experience. By the end of this article, you’ll confidently be able to create a book bag tailored to your exact preferences and needs.
What You’ll Need for Sewing a Book Bag
| Item | Quantity | Specifications |
|---|---|---|
| Fabric (Outer) | 1 yard | Durable cotton, canvas, denim, or oilcloth |
| Fabric (Lining) | 1 yard | Lightweight cotton or quilting fabric |
| Interfacing (Optional) | 1 yard | Medium-weight fusible interfacing for added structure |
| Webbing or Fabric for Straps | 2 yards | 1-2 inch wide webbing or self-fabric strips |
| Thread | 1 spool | Matching your fabric |
| Scissors | 1 pair | Fabric scissors |
| Measuring Tape | 1 | For accurate measurements |
| Pins | 1 box | For holding fabric pieces together |
| Sewing Machine | 1 | Standard sewing machine |
| Iron & Ironing Board | 1 each | For pressing seams |
| Seam Ripper | 1 | For fixing mistakes (everyone makes them!) |
Preparing Your Fabric and Pattern
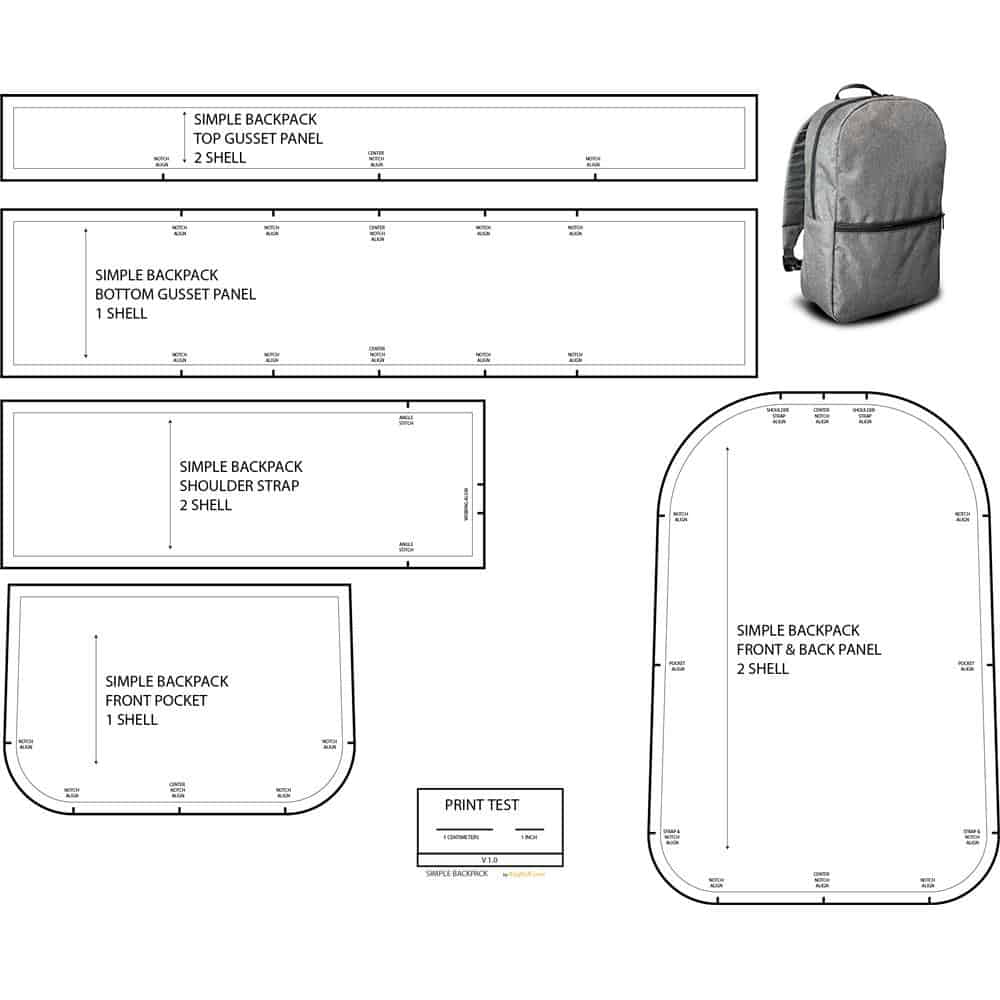
Creating a Pattern (Simple Rectangle Bag)
For a beginner-friendly rectangular book bag, you’ll need two main pieces:
- Bag Body: Cut two rectangles, 16 inches wide x 18 inches high (adjust dimensions to your preference).
- Straps: Cut two strips, 4 inches wide x 24 inches long (adjust length for desired strap length).
- Optional Pocket: Cut one rectangle for a front pocket, 8 inches wide x 10 inches high.
Fabric Preparation
- Wash and Iron: Wash and iron all fabrics before cutting to prevent shrinkage after sewing.
- Interfacing (Optional): If using interfacing, fuse it to the wrong side of your outer fabric pieces. This will give the bag more structure.
- Cut Fabric: Carefully cut out all fabric pieces according to your pattern.
Step-by-Step Sewing Process

Phase 1: Creating the Straps
- Fold and Press: Fold each strap piece in half lengthwise, wrong sides together, and press.
- Open and Fold Edges: Open the fold, and fold each long edge toward the center crease, pressing again.
- Fold Again: Fold the strap in half along the original crease, enclosing the raw edges. Press firmly.
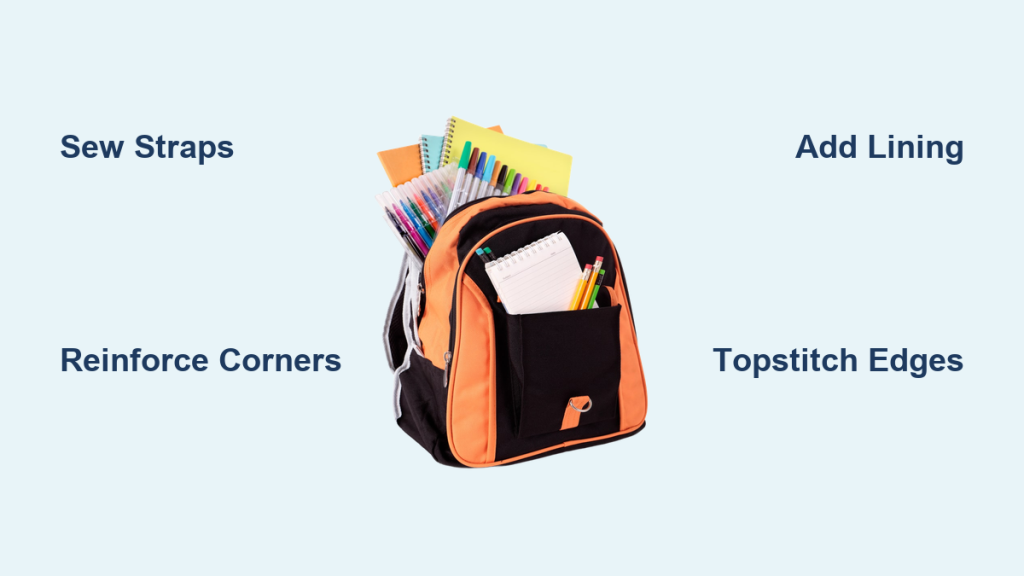
- Topstitch: Topstitch along both long edges of each strap, about 1/8 inch from the edge. This secures the folds and adds a finished look.
Phase 2: Constructing the Bag Body
- Attach Straps: Position the straps on the right side of one of the outer fabric pieces. Place them about 4 inches in from each side seam and 2-3 inches down from the top edge. Pin securely.
- Basting (Optional): Baste the straps in place to prevent shifting during sewing.
- Sew Bag Sides & Bottom: Place the two outer fabric pieces right sides together, aligning the edges. Sew along both side seams and the bottom seam, using a 1/2 inch seam allowance. Leave the top edge open.
- Reinforce Straps: Reinforce the strap attachment points with a few extra stitches.
Phase 3: Adding the Lining
- Sew Lining Sides & Bottom: Repeat steps 3 from Phase 2 with the lining fabric pieces, leaving a 4-6 inch opening in the bottom seam for turning the bag right-side out.
- Attach Lining to Bag: Place the outer bag inside the lining bag, right sides together, aligning the top edges.
- Sew Top Edge: Sew around the entire top edge, using a 1/2 inch seam allowance.
Phase 4: Finishing Touches
- Turn Right-Side Out: Reach through the opening in the lining and carefully turn the entire bag right-side out.
- Close Lining Opening: Hand-stitch or machine-stitch the opening in the lining closed.
- Push Lining In: Push the lining down into the bag, ensuring it sits neatly inside.
- Press: Press the top edge of the bag to create a clean finish.
- Topstitch (Optional): Topstitch around the top edge of the bag for a more polished look and added durability.
Pro Tips for a Perfect Book Bag

- Fabric Choice Matters: Canvas and denim are incredibly durable for heavy books, while lighter cottons are great for everyday use. Oilcloth is water-resistant, ideal for rainy days.
- Reinforce Stress Points: Extra stitching at the strap attachment points and corners of the bag will significantly increase its lifespan.
- Experiment with Pockets: Add interior or exterior pockets for smaller items like pens, phones, or keys.
- Customize with Appliqués or Embroidery: Personalize your bag with unique designs.
- Use a Walking Foot: If sewing with multiple layers or thick fabrics, a walking foot can help prevent the fabric from shifting.
- Pre-Wash Fabric: Always pre-wash your fabric to avoid shrinkage after the bag is sewn.
- Gradually Increase Seam Allowance: When turning corners, reduce the seam allowance slightly to create a smoother finish.
Professional Help
If you’re struggling with a particular step or find the sewing process overwhelming, consider:
- Local Sewing Classes: A great way to learn new techniques and get personalized guidance.
- Seamstress/Tailor: For complex designs or if you need help with a specific problem.
- Cost: Sewing classes range from $20-$100 per session. Tailor costs vary depending on the complexity of the work.
FAQ
Q: Can I use any type of fabric for the lining?
A: While most lightweight fabrics will work, avoid overly stretchy fabrics as they can distort the bag’s shape.
Q: What if I don’t have webbing for the straps?
A: You can easily make your own straps from the outer fabric. Just cut wider strips and follow the same folding and topstitching process.
Q: How do I add a magnetic snap closure?
A: Install the snap according to the manufacturer’s instructions, positioning it on the bag flap and the front of the bag.
Q: What if my seams are uneven?
A: Practice makes perfect! Try using a seam guide on your sewing machine to maintain a consistent seam allowance.
Alternative Solutions
If sewing isn’t your forte, consider upcycling an old tote bag or purchasing a pre-made canvas tote and adding personalized embellishments.
| Solution | Pros | Cons | Best For |
|---|---|---|---|
| Upcycled Tote | Eco-friendly, cost-effective | May lack durability or desired style | Quick, simple solution |
| Pre-Made Tote | Convenient, wide variety of styles | Less customizable | Those who prefer not to sew |
Enjoy Your New Book Bag!
Congratulations! You’ve successfully sewn a book bag. With its durable construction and personalized style, this bag is sure to become your go-to accessory for carrying books, supplies, or anything else you need on the go.
Remember, practice makes perfect. Don’t be afraid to experiment with different fabrics, designs, and embellishments to create a book bag that truly reflects your personality.
Share your finished book bag in the comments below! We’d love to see your creations.


