
Do you struggle to keep your library books safe and organized? Are you tired of flimsy plastic bags tearing and bending your precious reads? Sewing a library bag is a fantastic solution – it’s a simple project perfect for beginners and provides a durable, stylish way to transport your books. This guide will walk you through creating a classic library bag, starting with a quick method for a basic tote.
This comprehensive guide goes beyond a simple tote, covering fabric choices, detailed cutting instructions, multiple construction techniques (including adding pockets!), and finishing touches for a professional look. By the end of this article, you’ll have a beautiful, functional library bag you can be proud of, and the skills to customize it to your heart’s content.
Materials and Tools Needed
| Item | Quantity | Specifications |
|---|---|---|
| Cotton Fabric | 1 yard | Quilting cotton, canvas, or duck cloth recommended |
| Lining Fabric | 1 yard | Lightweight cotton for the inside |
| Interfacing (Optional) | 1 yard | Pellon SF101 or similar for added structure |
| Webbing or Fabric for Handles | 2 yards | 1″ – 1.5″ wide |
| Coordinating Thread | 1 spool | To match fabric |
| Rotary Cutter or Fabric Scissors | 1 | |
| Cutting Mat | 1 | 24″ x 36″ recommended |
| Quilting Ruler | 1 | 6″ x 24″ recommended |
| Sewing Machine | 1 | With standard presser foot |
| Iron & Ironing Board | 1 | |
| Pins or Clips | 1 box | |
| Seam Ripper | 1 | For fixing mistakes |
| Measuring Tape | 1 |
Preparing Your Fabric & Cutting
Choosing Your Fabric
The best fabric for a library bag is durable and can withstand the weight of books. Quilting cotton is a good starting point, but canvas or duck cloth will provide more structure. For the lining, a lightweight cotton is ideal. Consider using interfacing if you want a more rigid bag.
Cutting Instructions
- Main Fabric: Cut two rectangles measuring 16″ x 18″.
- Lining Fabric: Cut two rectangles measuring 16″ x 18″.
- Interfacing (Optional): Cut two rectangles measuring 16″ x 18″. Apply interfacing to the wrong side of the main fabric pieces according to the manufacturer’s instructions.
- Handles: Cut two pieces of webbing or fabric measuring 28″ each. If using fabric for handles, cut 4″ wide strips, fold in half lengthwise, and press.
Constructing the Library Bag
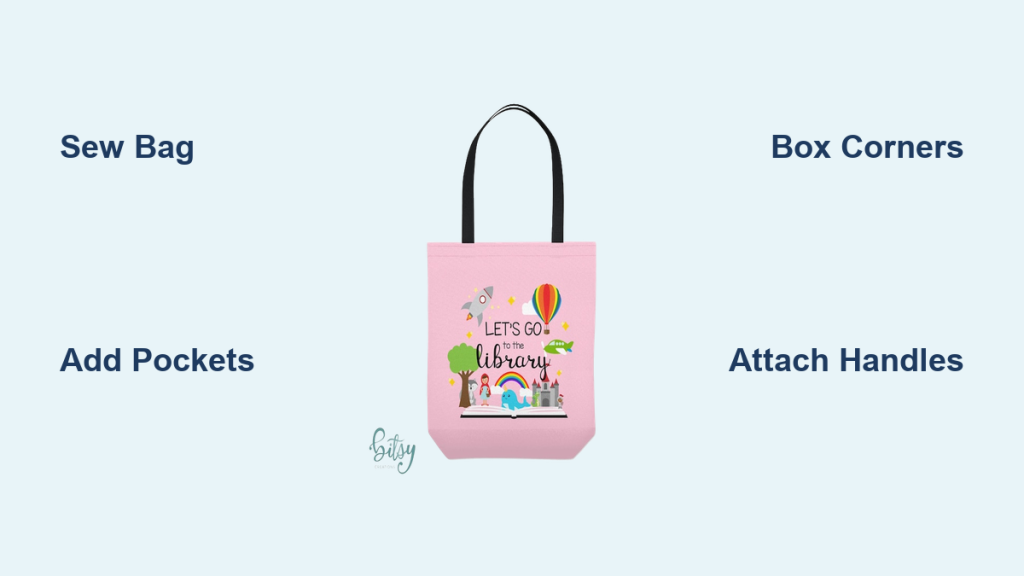
Phase 1: Assembling the Main Bag Body
- Sew Main Fabric Pieces Together: Place the two main fabric pieces right sides together. Sew along both side seams, using a ½” seam allowance. Press seams open.
- Boxed Corners: To create a flat bottom, box the corners. Flatten one corner, matching side and bottom seams to form a triangle. Measure 2″ down from the point of the triangle and draw a line across. Sew along the line and trim the excess fabric, leaving a ½” seam allowance. Repeat for the other corner.
Phase 2: Assembling the Lining
- Sew Lining Pieces Together: Place the two lining fabric pieces right sides together. Sew along both side seams, using a ½” seam allowance. Leave a 6″ opening in the bottom seam for turning. Press seams open.
- Boxed Corners (Lining): Repeat the boxed corner process from the main bag body on the lining, but do not sew the opening closed.
Phase 3: Attaching the Handles
- Position Handles: Turn the main bag body right side out. Measure 4″ in from each side seam at the top edge. Pin or clip the ends of the handles in place, ensuring they are securely attached.
- Sew Handles: Sew the handles to the bag body, reinforcing the stitching with a box-X pattern for extra durability. Repeat for the other handle.
Phase 4: Joining Main Bag and Lining
- Insert Lining: Place the lining inside the main bag body, wrong sides together. Align the top edges.
- Pin and Sew: Pin the lining to the main bag around the top edge. Sew around the entire opening, using a ½” seam allowance.
- Turn Right Side Out: Reach through the opening in the lining and pull the entire bag right side out.
- Close Lining Opening: Hand-stitch the opening in the lining closed using a blind stitch.
- Push Lining In: Push the lining neatly into the bag. Press the top edge of the bag for a clean finish.
Adding Pockets (Optional)

Patch Pockets
- Cut Pocket Fabric: Cut a rectangle of fabric for the pocket, approximately 8″ x 10″.
- Fold and Press: Fold the top edge of the pocket down ½” and press. Fold down another 1.5″ and press again to create a casing for the top edge.
- Sew Pocket: Sew along the bottom and sides of the pocket. Topstitch along the folded edge.
- Attach to Bag: Position the pocket on the outside of the bag and pin in place. Sew around the sides and bottom, leaving the top open.
Interior Pockets
Follow the same steps as above but attach the pocket to the lining before sewing the lining to the bag body.
Pro Tips
- Fabric Pre-washing: Always pre-wash your fabric to prevent shrinking after the bag is sewn.
- Seam Allowance Consistency: Maintaining a consistent seam allowance is crucial for a professional finish.
- Reinforced Stitching: Reinforce stress points, like handle attachments, with extra stitching.
- Use a Walking Foot: If working with thick fabrics, a walking foot can help feed the fabric evenly through your sewing machine.
- Experiment with Embellishments: Add embroidery, applique, or decorative buttons to personalize your bag.
- Handle Length Adjustment: Customize the handle length to suit your preferred carrying style.
- Interfacing Alternatives: If you don’t have interfacing, use a heavier weight fabric for a more structured bag.
Professional Help

If you’re struggling with a particular step or don’t have access to a sewing machine, consider:
- Local Sewing Classes: Many fabric stores and community centers offer sewing classes.
- Seamstress/Tailor: A professional seamstress can complete the project for you or provide assistance with difficult techniques.
- Cost: Professional sewing services typically range from $30-$60 per hour.
FAQ
Q: What fabric weight is best for a library bag?
A: Medium to heavyweight fabrics like canvas, duck cloth, or sturdy quilting cotton are ideal. These fabrics will hold up well to the weight of books.
Q: Can I use different handle materials?
A: Absolutely! You can use rope, leather straps, or even repurposed belts for a unique look.
Q: How do I prevent the handles from slipping off the bag?
A: Reinforce the stitching with a box-X pattern and consider using a heavier-duty webbing.
Q: What if my bag is uneven after sewing?
A: Carefully seam rip the affected areas and re-sew, paying close attention to seam allowances and fabric alignment.
Alternative Solutions
If you’re not comfortable sewing, consider purchasing a pre-made library bag online or at a craft store. However, remember that a handmade bag offers a unique, personalized touch that a store-bought option can’t replicate.
| Solution | Pros | Cons | Best For |
|---|---|---|---|
| Pre-Made Bag | Convenient, fast | Limited customization, potentially lower quality | Those who need a bag immediately and don’t want to sew |
| Repurposed Tote Bag | Eco-friendly, inexpensive | May not be as durable or stylish | Quick and budget-friendly option |
Keep Your Books Safe & Stylish
Congratulations! You’ve successfully sewn a library bag. By following these steps, you’ve created a durable, personalized bag that will protect your library books for years to come.
Remember these key takeaways:
* Choose durable fabric for longevity.
* Boxed corners create a flat bottom for easy packing.
* Reinforced stitching ensures handles stay secure.
Don’t be afraid to experiment with different fabrics, embellishments, and pocket designs to create a library bag that truly reflects your style.
Show off your finished library bag! Share a picture in the comments below, and let us know how this guide helped you!


