
Are you tired of cluttered spaces and struggling to find what you need? Sewing your own organizer bag is a fantastic solution! It’s a rewarding project that allows for complete customization, and this guide will walk you through the entire process, from choosing fabrics to finishing touches. If you’re feeling overwhelmed, we’ll start with a quick fix: repurpose an old tote bag to create a simple hanging organizer.
This comprehensive guide will cover everything you need to know to sew a durable, functional, and beautiful organizer bag. We’ll explore fabric choices, essential tools, a detailed step-by-step sewing process, and even pro tips to elevate your project. By the end of this article, you’ll have the skills and confidence to create organizer bags of any size and complexity.
What You’ll Need for Sewing an Organizer Bag
| Item | Quantity | Specifications |
|---|---|---|
| Fabric (Outer) | 1/2 – 1 Yard | Durable cotton, canvas, or denim |
| Fabric (Lining) | 1/2 – 1 Yard | Quilting cotton or similar lightweight fabric |
| Interfacing | 1/2 – 1 Yard | Pellon SF101 or similar woven interfacing for structure |
| Zippers | 1 or more | Length determined by bag size; #3 or #5 coil zippers recommended |
| Webbing/Straps | 1-2 Yards | 1″ – 1.5″ width for handles or shoulder straps |
| Thread | 1 Spool | Matching fabric colors |
| Rivets/Snaps | Optional | For securing straps or closures |
| Sewing Machine | 1 | With standard presser foot |
| Rotary Cutter & Mat | 1 | For precise fabric cutting |
| Ruler | 1 | Quilting ruler recommended for accuracy |
| Iron & Ironing Board | 1 | For pressing seams |
| Pins or Clips | 1 Box | For holding fabric layers together |
| Fabric Scissors | 1 | For trimming threads and fabric |
| Seam Ripper | 1 | For correcting mistakes |
| Marking Pen/Chalk | 1 | For transferring patterns |
Preparing for Your Sewing Project
Before you start cutting fabric, careful preparation will ensure a smooth process.
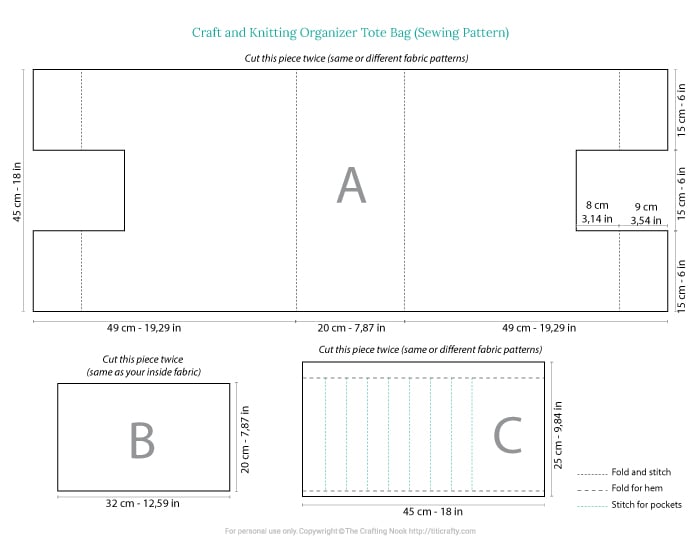
- Choose Your Pattern: Numerous free and paid organizer bag patterns are available online. Select one that matches your skill level and desired size/features.
- Wash and Iron Fabric: Pre-washing prevents shrinkage after the bag is sewn. Ironing eliminates wrinkles for accurate cutting and sewing.
- Cut Fabric: Following your pattern instructions, accurately cut all fabric pieces (outer fabric, lining fabric, interfacing, pockets, etc.).
- Apply Interfacing: Fuse interfacing to the wrong side of the outer fabric pieces to provide structure and stability. Follow the interfacing manufacturer’s instructions.
- Marking: Use a marking pen or chalk to transfer pattern markings onto the fabric. This includes zipper placement, pocket locations, and stitch lines.
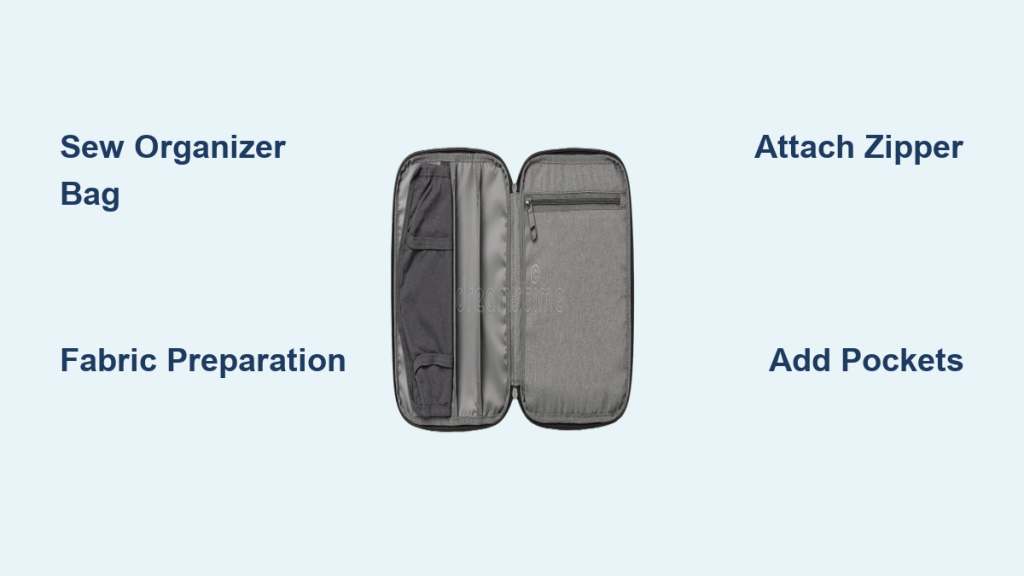
Step-by-Step Sewing Process
Phase 1: Constructing the Pockets (If Applicable)
- Prepare Pocket Pieces: Cut out pocket fabric according to your pattern. Fold and press the top edge of each pocket down 1/2″ to create a finished hem.
- Attach Pockets to Front Panel: Pin the pockets onto the right side of the front outer fabric piece, aligning with marked placement lines.
- Stitch Pockets: Topstitch around the sides and bottom of each pocket to secure it.
Phase 2: Installing the Zippers

- Prepare Zipper Placement: On the top edge of the outer fabric and lining fabric pieces, mark the zipper placement based on your pattern.
- Attach Zipper to Outer Fabric: Using a zipper foot on your sewing machine, stitch the zipper to the right side of the outer fabric.
- Attach Zipper to Lining Fabric: Repeat the process, attaching the zipper to the right side of the lining fabric. Ensure the zipper teeth are aligned.
Phase 3: Assembling the Bag Body
- Sew Outer Bag Sides and Bottom: With right sides together, stitch the side and bottom seams of the outer fabric, leaving the top open.
- Sew Lining Bag Sides and Bottom: Repeat the process with the lining fabric, leaving a 4-6 inch opening in the bottom seam for turning.
- Box the Corners (Optional): To create a more structured bag, box the corners by folding the bottom corners to meet the side seams and stitching across.
Phase 4: Joining Outer and Lining
- Turn Outer Bag Right Side Out: Carefully turn the outer bag right side out.
- Insert Lining into Outer Bag: Place the lining inside the outer bag, with right sides together.
- Align and Pin: Align the top edges of the outer and lining bags, matching the zipper and side seams. Pin securely.
- Stitch Around the Top Edge: Stitch around the entire top edge, securing the lining to the outer bag.
Phase 5: Finishing Touches
- Turn Bag Right Side Out: Through the opening in the lining, carefully turn the entire bag right side out.
- Close Lining Opening: Hand-stitch the opening in the lining closed using a blind stitch.
- Press and Topstitch: Press the top edge of the bag and topstitch around the zipper for a clean finish.
- Attach Straps/Handles: Attach webbing straps or handles to the bag using rivets, snaps, or by stitching them securely.
How to Prevent Future Sewing Mistakes
- Always test stitch: Before sewing your project, test your stitch settings on scrap fabric.
- Pin or clip carefully: Ensure fabric layers are aligned before sewing.
- Press seams as you go: Pressing seams flat creates a professional finish.
- Use a seam ripper: Don’t be afraid to undo mistakes.
- Read the pattern thoroughly: Understand all instructions before starting.
Pro Tips for a Stunning Organizer Bag

- Fabric Combinations: Mix and match fabrics for a unique look. Use contrasting fabrics for pockets or lining.
- Customization: Add embellishments like embroidery, patches, or decorative stitching.
- Reinforced Seams: Double-stitch high-stress areas like strap attachments for added durability.
- Key Clip: Add a small key clip inside the bag to keep keys secure.
- Interior Dividers: Create adjustable interior dividers using Velcro or elastic to customize the bag’s compartments.
- Water Resistance: Use water-resistant fabric or apply a fabric protector spray for added functionality.
Professional Help
If you’re struggling with a specific step or feel overwhelmed, consider:
- Local Sewing Classes: Many fabric stores or community centers offer sewing classes.
- Online Tutorials: YouTube and other platforms have countless sewing tutorials.
- Professional Seamstress/Tailor: For complex projects or repairs, a professional can provide expert assistance.
- Cost: Sewing classes can range from $20-$100+ per session. Hiring a seamstress typically costs $30-$80+ per hour.
FAQ
Q: What type of fabric is best for an organizer bag?
A: Durable fabrics like cotton canvas, denim, or upholstery fabric are ideal for the outer layer. Quilting cotton is excellent for the lining.
Q: How do I choose the right zipper length?
A: Measure the opening where the zipper will be placed and subtract about 1/2 inch on each end for seam allowances.
Q: Can I use a regular presser foot for sewing zippers?
A: While possible, a zipper foot is highly recommended. It allows you to sew close to the zipper teeth for a professional finish.
Q: What interfacing should I use?
A: Pellon SF101 is a popular woven interfacing that provides good structure without adding excessive stiffness.
Alternative Solutions
If you’re new to sewing or short on time, consider these alternatives:
| Solution | Pros | Cons | Best For |
|---|---|---|---|
| Repurposing a Tote Bag | Quick, Easy, Eco-Friendly | Limited Customization | Simple Hanging Organizers |
| Using a Pre-Made Bag | Convenient, Affordable | Limited Design Options | Basic Storage Needs |
| Buying a Finished Organizer Bag | Instant Solution | No Customization | Immediate Organization |
Enjoy Your New Organizer Bag!
Congratulations on completing your organizer bag! You now have a functional and stylish solution for keeping your belongings tidy. Remember, practice makes perfect, so don’t be afraid to experiment with different fabrics, patterns, and techniques.
What will you organize first with your new bag? Share your creations and tips in the comments below!


