
Do you love hitting the trails with your scout backpack, but it’s starting to look…well, loved? Mud, dirt, and lingering odors can quickly accumulate, making your pack less enjoyable to use. A thorough cleaning can restore its functionality and appearance, and thankfully, it’s easier than you might think. This guide will walk you through everything you need to know to clean your scout backpack effectively.
This comprehensive guide goes beyond just surface cleaning. We’ll cover everything from prepping your pack for a wash, to deep cleaning specific problem areas, and finally, proper drying and storage techniques. By the end of this article, you’ll have the knowledge to keep your scout backpack in top condition for years of adventures.
Understanding Your Scout Backpack Material
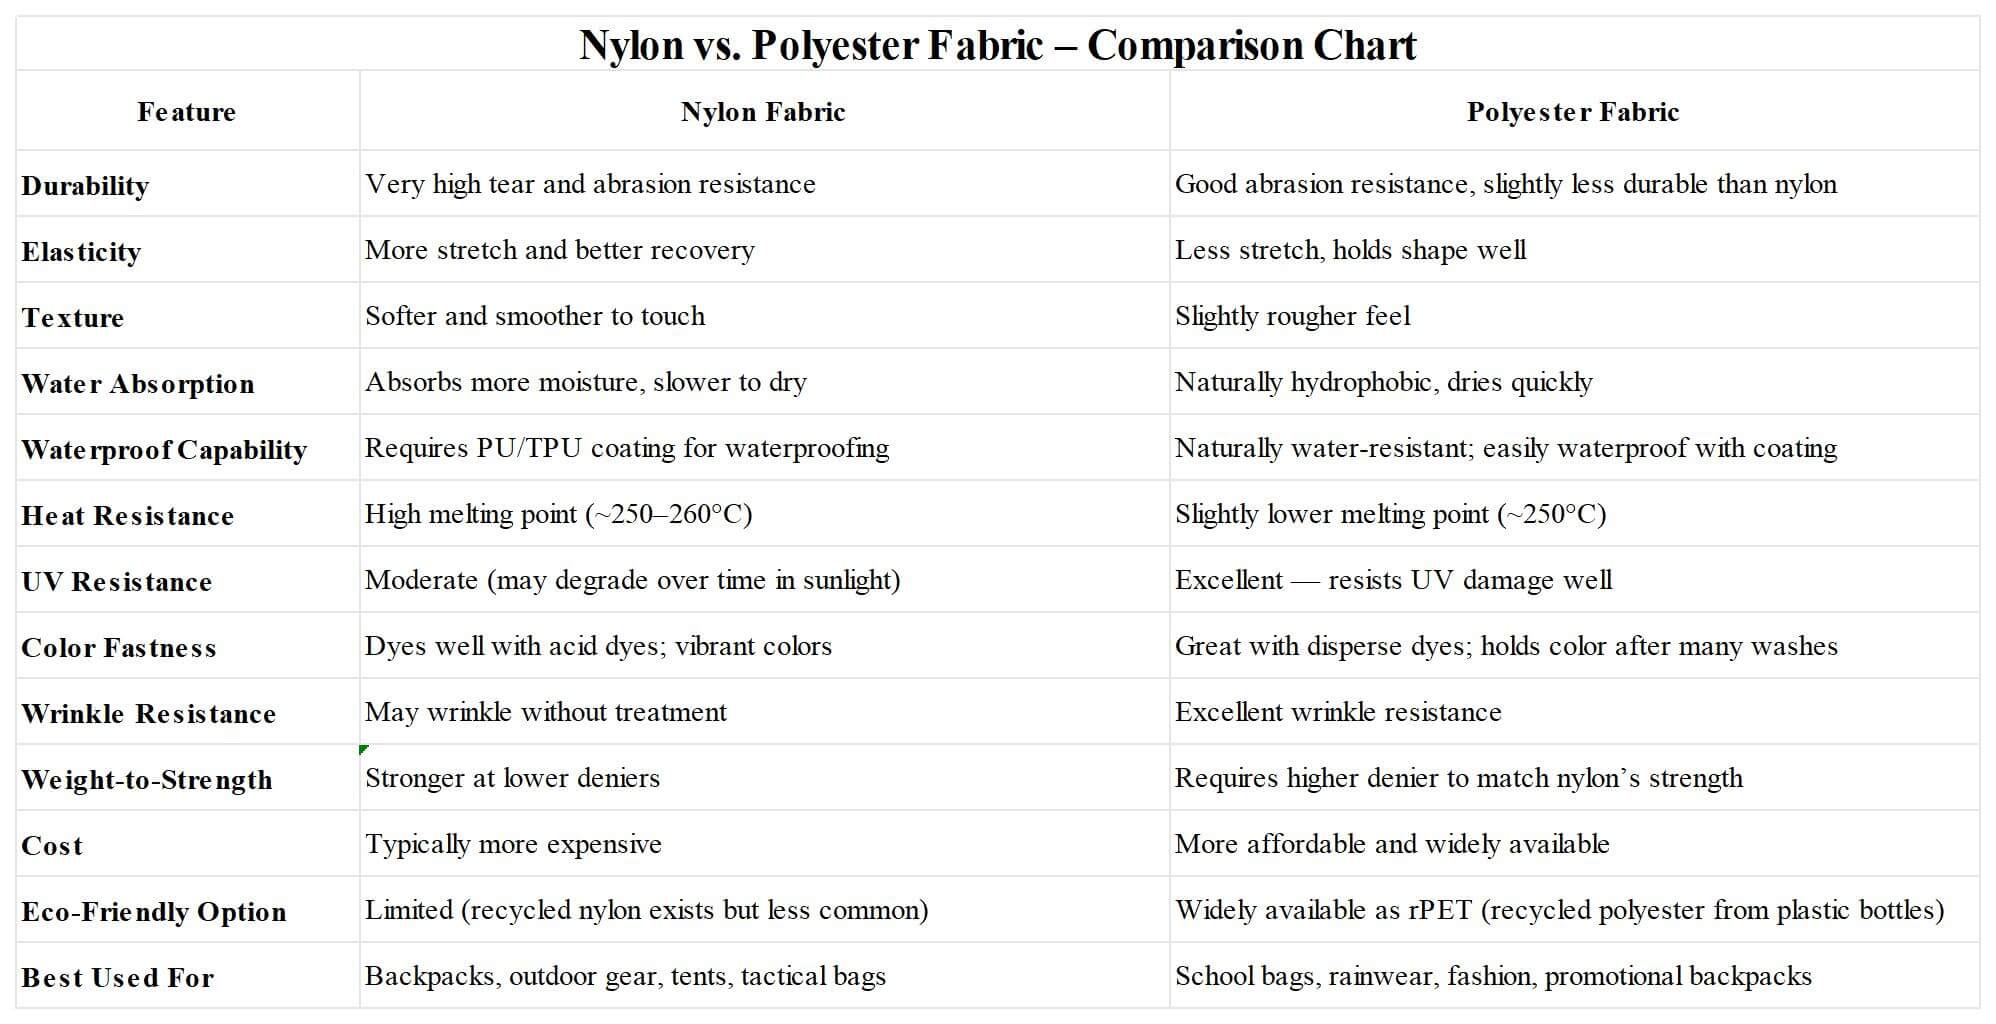
Before diving into cleaning, it’s crucial to understand your backpack’s material. Most scout backpacks are made from durable materials like nylon or polyester. However, some may have leather accents or specialized coatings.
- Nylon: Highly durable, water-resistant, and relatively easy to clean.
- Polyester: Similar to nylon but generally more affordable and UV resistant.
- Canvas: Often coated for water resistance, requires gentle cleaning.
- Leather: Needs specialized leather cleaners and conditioners.
Important: Always check the manufacturer’s care label for specific cleaning instructions. If no label exists, test any cleaning solution on a small, inconspicuous area first.
Materials You’ll Need
- Soft-bristled brush (toothbrush, nail brush, or dedicated backpack brush)
- Mild detergent (liquid laundry detergent or specialized outdoor gear cleaner)
- Warm water
- Clean cloths or sponges
- Bucket or tub
- Optional: Backpack waterproofing spray
How to Clean a Scout Backpack: A Step-by-Step Guide
Phase 1: Preparation & Emptying
- Empty all pockets and compartments: Remove everything, including small items hidden in crevices.
- Shake out loose debris: Turn the backpack upside down and shake vigorously to remove dirt, leaves, and crumbs.
- Remove detachable components: If your backpack has a rain cover, detachable pockets, or a frame, remove these for separate cleaning.
- Inspect for damage: Check for tears, broken zippers, or loose stitching. Address these issues before cleaning to prevent further damage.
Phase 2: Surface Cleaning
- Prepare the cleaning solution: Mix a small amount of mild detergent with warm water in a bucket or tub. Avoid using harsh chemicals or bleach, as these can damage the fabric.
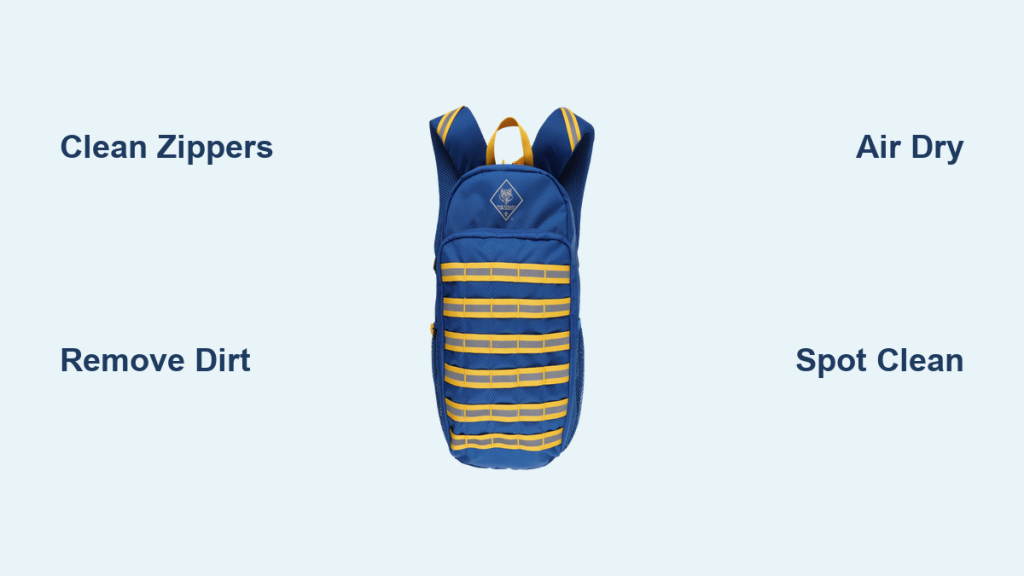
- Spot clean stains: For localized stains, apply a small amount of the cleaning solution directly to the stain and gently scrub with a soft-bristled brush.
- Wipe down the exterior: Dip a clean cloth or sponge into the cleaning solution and wipe down the entire exterior of the backpack. Pay attention to areas prone to dirt buildup, such as the bottom and shoulder straps.
- Clean the zippers: Use a toothbrush or small brush to clean around the zippers, removing dirt and debris that can cause them to stick.
Phase 3: Deep Cleaning (If Necessary)
If your backpack is heavily soiled or has stubborn odors, a deeper clean may be required.
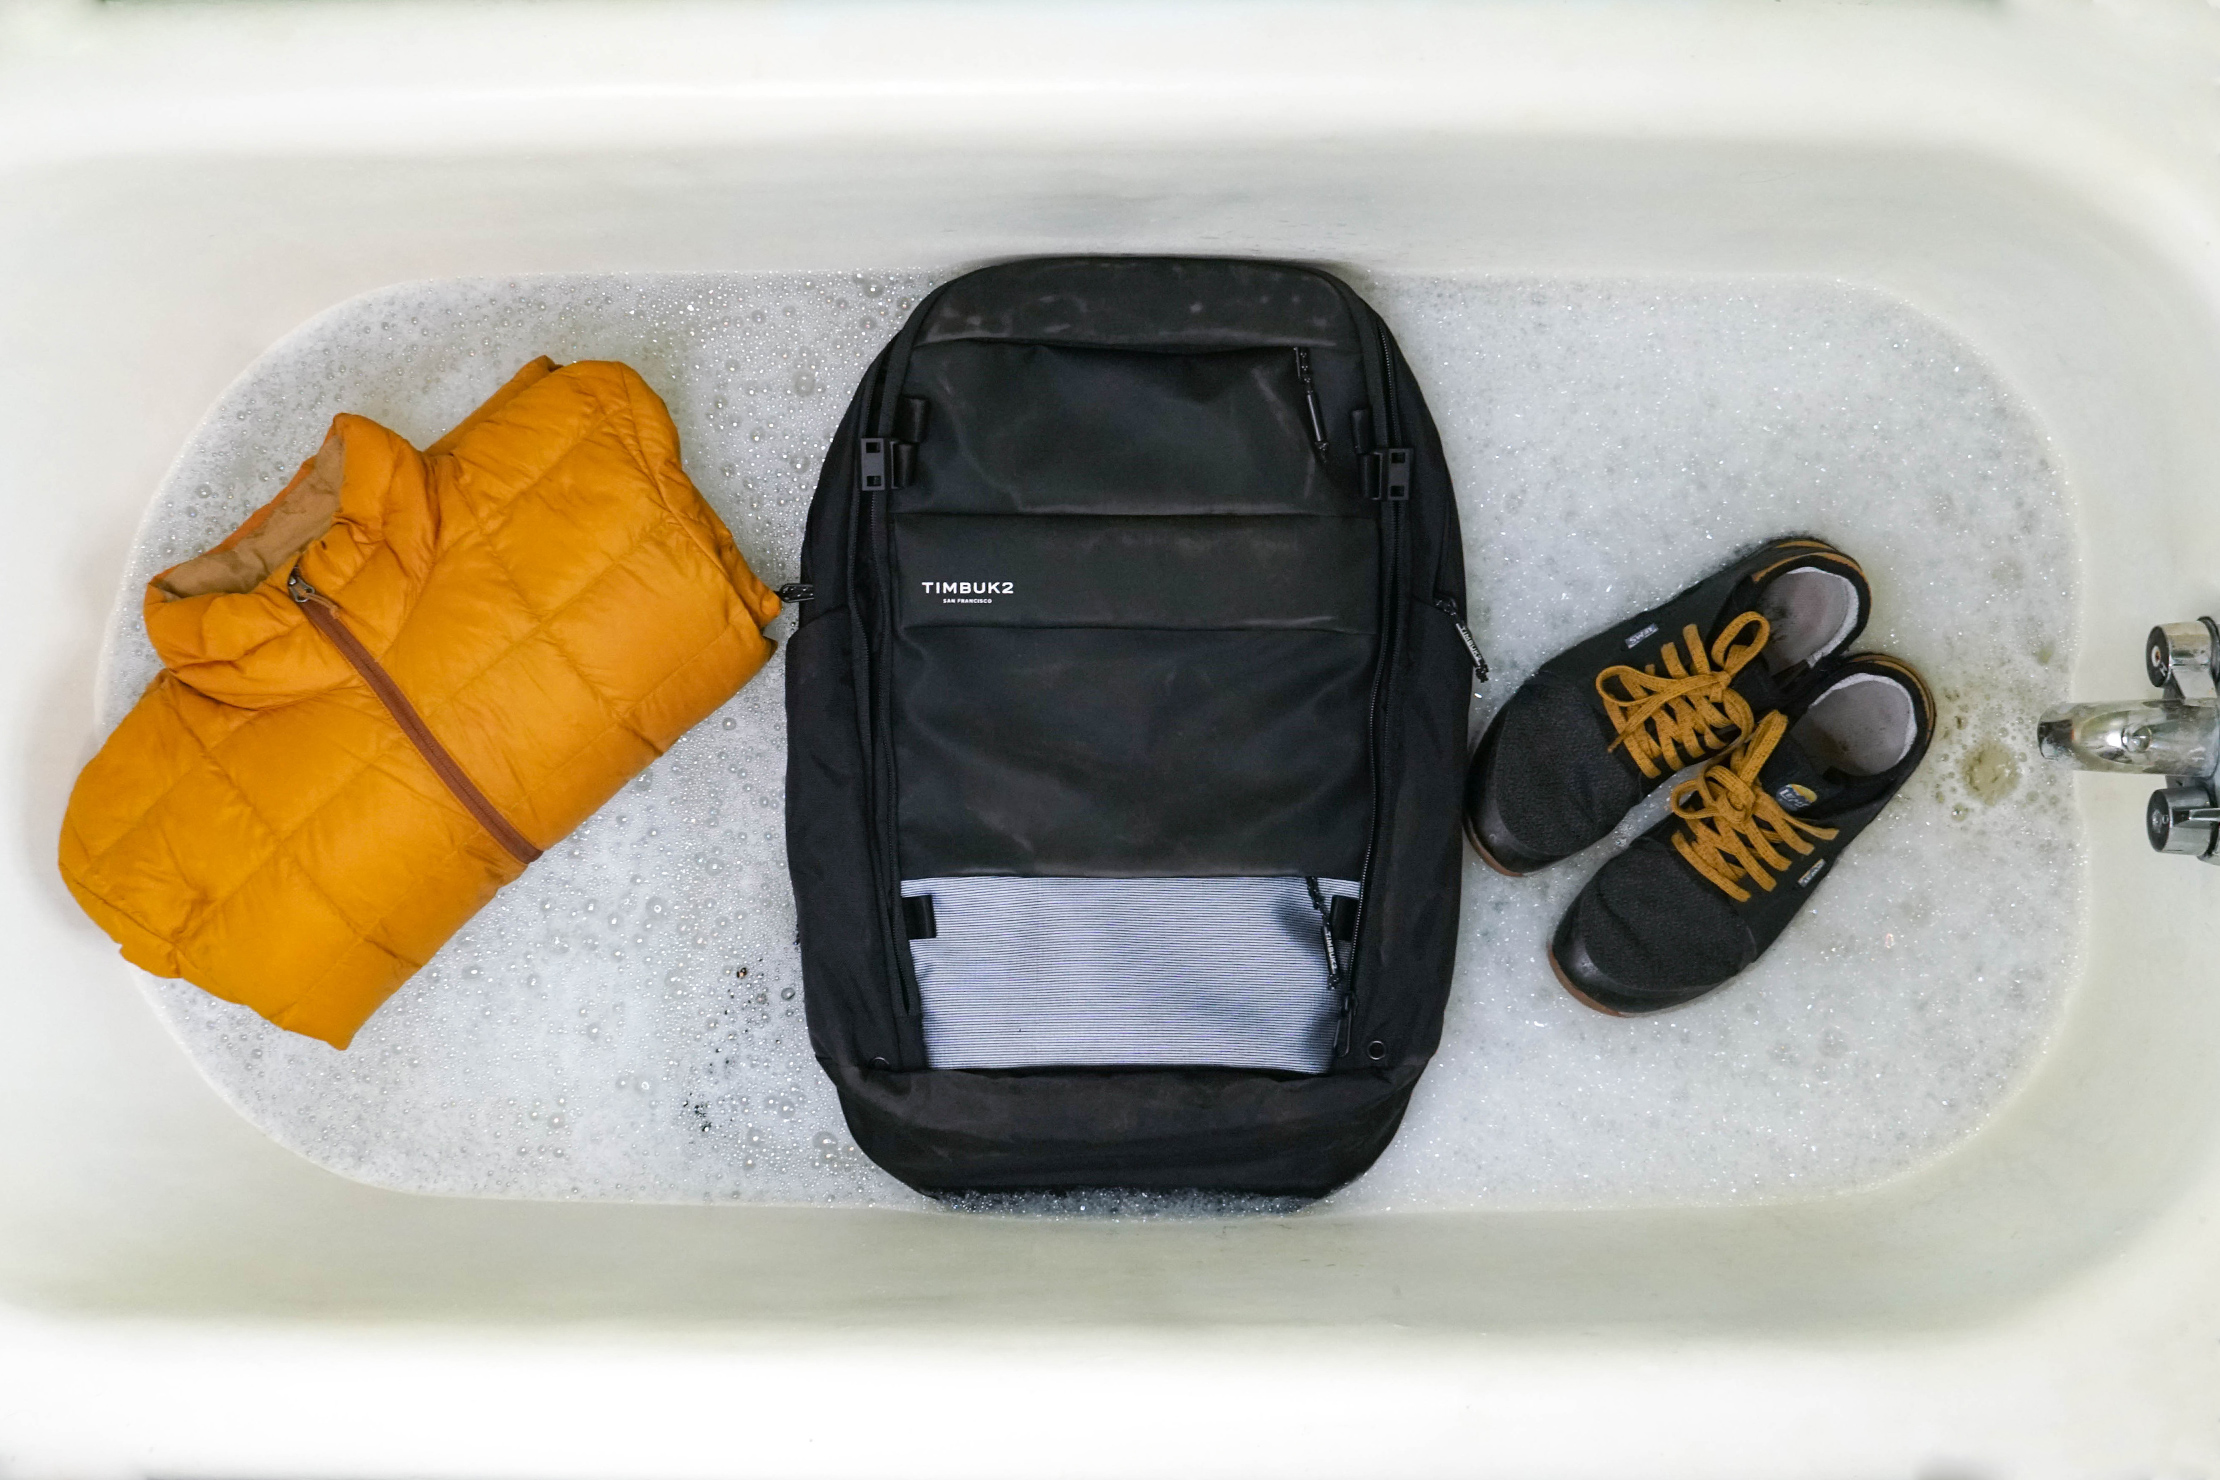
- Submerge (carefully): If the care label allows, you can carefully submerge the backpack in a tub of lukewarm, soapy water. Do not fully submerge leather components.
- Gentle agitation: Gently agitate the water to loosen dirt and grime. Avoid harsh scrubbing, as this can damage the fabric.
- Rinse thoroughly: Rinse the backpack thoroughly with clean water to remove all traces of detergent. Ensure no soap residue remains, as this can attract dirt.
Phase 4: Drying & Storage
- Air dry completely: Allow the backpack to air dry completely in a well-ventilated area, away from direct sunlight or heat. Direct sunlight can fade colors and damage the fabric.
- Turn and reposition: Turn and reposition the backpack periodically to ensure even drying.
- Stuff with towels: To help maintain its shape, stuff the backpack with clean towels while it dries.
- Re-waterproof (optional): Once dry, consider applying a backpack waterproofing spray to restore water resistance, especially if the fabric has been worn or washed multiple times.
- Store properly: Store the backpack in a cool, dry place, away from direct sunlight and moisture.
Pro Tips for Backpack Care
- Clean after every trip: A quick wipe-down after each hike can prevent dirt from building up and becoming difficult to remove.
- Address spills immediately: Don’t let spills sit and stain. Clean them up as soon as possible with a damp cloth.
- Use a rain cover: Protect your backpack from the elements with a rain cover during wet weather.
- Avoid overfilling: Overfilling can strain the seams and zippers, leading to damage.
- Store with frame supported: If your backpack has a frame, ensure it’s properly supported during storage to prevent warping.
- Odor control: Baking soda can help absorb odors. Sprinkle a small amount inside the pack, let it sit overnight, and vacuum it out.
When to Seek Professional Help
- Severe damage: If your backpack has significant tears, broken zippers, or damaged seams, consider taking it to a professional repair shop.
- Stubborn stains: If you’ve tried multiple cleaning methods and can’t remove a stubborn stain, a professional cleaner may have specialized solutions.
- Leather care: For leather accents, professional leather cleaning and conditioning are recommended.
FAQ
Q: Can I put my scout backpack in the washing machine?
A: Generally, no. Washing machines can be too harsh and damage the fabric, zippers, and frame. Handwashing is the safest option.
Q: What’s the best way to clean the inside of my backpack?
A: Turn the backpack inside out and shake out any loose debris. Then, use a damp cloth with mild detergent to wipe down the interior.
Q: How do I clean mold or mildew from my backpack?
A: Mix a solution of water and white vinegar (1:1 ratio) and apply it to the affected areas. Let it sit for a few minutes, then scrub gently with a brush and rinse thoroughly. Ensure it dries completely.
Q: Can I use bleach to clean my backpack?
A: No, bleach can damage the fabric and cause discoloration. Avoid using harsh chemicals like bleach.
Enjoy a Clean and Ready-to-Go Backpack!
Now that you’ve cleaned your scout backpack, you’re ready for your next adventure! By following these steps, you can keep your pack in excellent condition, extending its lifespan and ensuring it’s always ready for the trail.
Share your backpack cleaning tips in the comments below! What are your go-to methods for keeping your gear clean and maintained?


