
Finding your bean bag losing its plumpness and freshness? It’s a common problem – bean bag filling gets dirty, compressed, and can even develop odors over time. Don’t worry, you don’t need to replace the whole thing! This comprehensive guide will walk you through how to clean bean bag filling, restoring it to its former glory. We’ll start with a quick method to freshen up the beads, and then dive into more thorough cleaning processes, along with preventative measures to keep your bean bag comfortable for years to come.
Bean bags are loved for their comfort, but the filling – typically polystyrene beads – can become a breeding ground for dust, dirt, and even mildew. This guide will provide multiple solutions, from simple airing-out techniques to more involved washing and disinfecting methods. By the end, you’ll have the knowledge to tackle even the most neglected bean bag filling and enjoy a clean, cozy seat once again.
Understanding Bean Bag Filling and Why It Needs Cleaning
Before we jump into the cleaning methods, it’s important to understand what bean bag filling is and why it gets dirty. Most bean bags are filled with expanded polystyrene (EPS) beads, a lightweight plastic foam. These beads are prone to attracting dust, dirt, oils from skin, and can absorb odors. Compression over time also reduces their fluffiness.
Common Causes of Dirty Bean Bag Filling
- Dust Accumulation: Everyday household dust settles into the beads.
- Skin Oils & Sweat: Body oils transfer from users, causing buildup.
- Food & Drink Spills: Accidents happen, and spills contaminate the filling.
- Moisture & Mildew: Exposure to dampness can lead to mildew growth, causing unpleasant odors.
- Compression: Prolonged use flattens the beads, reducing their volume and making them feel less supportive.
How to Clean Bean Bag Filling: Multiple Methods

Here are several methods for cleaning bean bag filling, ranging from quick refreshes to deep cleaning. Choose the method that best suits the condition of your bean bag and the level of cleaning required.
Method 1: Airing Out & Vacuuming (Quick Refresh)
This is the simplest method for lightly soiled bean bags. It’s great for regular maintenance to prevent buildup.
Diagnosing the Issue
This method works best for bean bags that feel slightly compressed or have a mild odor. It won’t address significant stains or deep-seated dirt.
Fix Steps
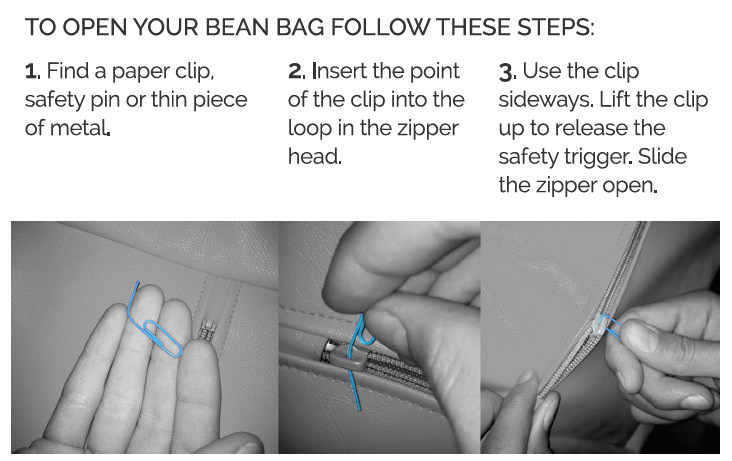
- Empty the Bean Bag: Carefully empty all the beads into a large, clean container (large plastic bins or garbage bags work well).
- Air Out the Beads: Spread the beads in a thin layer on a clean, dry surface outdoors in the sun (if possible). Allow them to air out for several hours, or even a full day. Sunlight helps to kill bacteria and reduce odors.
- Vacuum the Beads: Use a vacuum cleaner with a hose attachment and upholstery brush to gently vacuum the beads. This removes dust and loose debris. Important: Use a low suction setting to avoid damaging the beads.
- Refill the Bean Bag: Carefully pour the cleaned beads back into the bean bag cover.
Testing
Feel the beads. They should feel less compressed and have a fresher scent.
Method 2: Washing with Mild Soap & Water (Moderate Cleaning)
This method is suitable for bean bags that are moderately dirty or have a noticeable odor.
Diagnosing the Issue
This is a good option if airing out and vacuuming aren’t enough to remove odors or grime.
Fix Steps
- Empty & Prepare: Empty the bean bag as described in Method 1.
- Fill a Large Container: Fill a large container (tub, large sink, or plastic bin) with lukewarm water and a small amount of mild dish soap. Important: Avoid harsh detergents or bleach, as these can damage the beads.
- Wash the Beads: Add the beads to the soapy water and gently agitate them with your hands. Avoid vigorous scrubbing, as this can crush the beads.
- Rinse Thoroughly: Drain the soapy water and rinse the beads multiple times with clean water until all traces of soap are gone. Important: Thorough rinsing is crucial to prevent soap residue from attracting more dirt.
- Dry Completely: Spread the beads in a thin layer on a clean, dry surface (preferably outdoors in the sun) and allow them to air dry completely. This can take several days, depending on the weather. Important: Ensure the beads are completely dry before refilling the bean bag to prevent mildew growth.
- Refill the Bean Bag: Carefully pour the dried beads back into the bean bag cover.
Testing
Check for any soapy residue. Beads should feel clean and dry.
Method 3: Disinfecting with Isopropyl Alcohol (Odor Removal & Sanitizing)
This method is best for bean bags with stubborn odors or that need sanitizing.
Diagnosing the Issue
Use this method for bean bags that have absorbed strong odors (smoke, pet smells) or need to be disinfected.
Fix Steps
- Empty & Air Dry: Empty the bean bag and allow the beads to air dry completely.
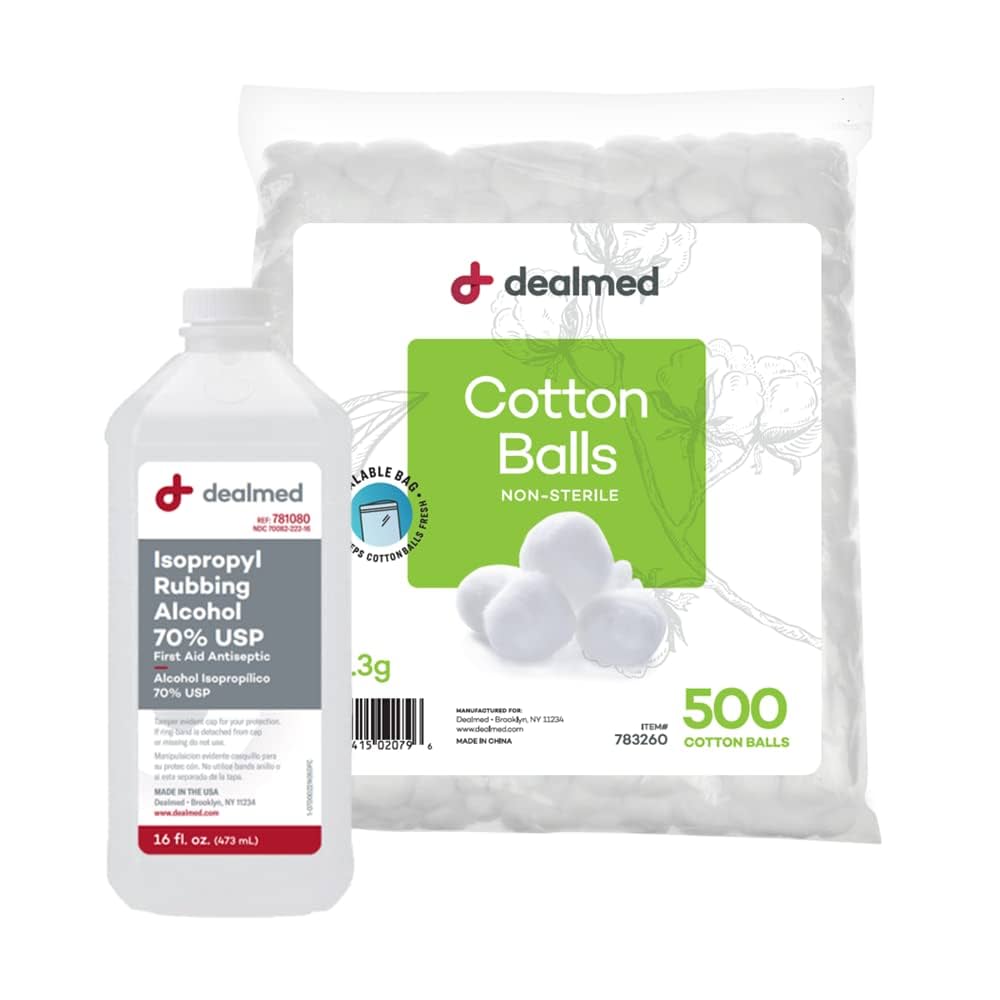
- Spray with Isopropyl Alcohol: Place the beads in a well-ventilated area and lightly spray them with isopropyl alcohol (70% concentration). Important: Work in a well-ventilated area and avoid direct contact with skin and eyes.
- Mix & Air Dry: Gently mix the beads to ensure even distribution of the alcohol. Allow them to air dry completely. The alcohol will evaporate, leaving the beads disinfected and with a reduced odor.
- Refill the Bean Bag: Carefully pour the beads back into the bean bag cover.
Testing
Sniff the beads. The odor should be significantly reduced or eliminated.
Prevention Tips and Maintenance Advice
Keeping your bean bag clean is much easier than restoring it after it’s become heavily soiled.
- Regular Vacuuming: Vacuum the bean bag cover regularly to remove dust and debris.
- Spot Cleaning: Clean up spills immediately with a damp cloth and mild soap.
- Airing Out: Periodically air out the bean bag and its filling to prevent odors.
- Protective Cover: Consider using a protective cover to shield the bean bag from spills and stains.
- Avoid Direct Sunlight: Prolonged exposure to direct sunlight can fade the fabric and damage the beads.
Pro Tips for Bean Bag Filling Care
- Adding More Fill: If your bean bag feels flat, you can add more filling. You can purchase additional EPS beads online or at some furniture stores.
- Mixing Bead Sizes: Combining different sizes of beads can create a more comfortable and supportive feel.
- Replacing Compressed Beads: If the beads are severely compressed and won’t fluff up, it’s time to replace them.
- Storage: When not in use, store the bean bag in a dry, well-ventilated area.
- Don’t Machine Wash: Never put bean bag filling in a washing machine, as this will likely crush the beads.
Professional Help Section
Sometimes, cleaning bean bag filling is best left to the professionals.
Signs You Need Professional Help
- Severe Mildew: Extensive mildew growth that cannot be removed with home methods.
- Large Spills: Significant spills that have deeply penetrated the filling.
- Damaged Bean Bag Cover: A torn or damaged bean bag cover that requires repair or replacement.
What to Look For in a Service Provider
- Experience: Choose a service provider with experience cleaning bean bags.
- Reputation: Check online reviews and ask for references.
- Pricing: Get quotes from multiple providers before making a decision.
FAQ Section
Q: Can I use bleach to clean bean bag filling?
A: No, bleach can damage the polystyrene beads and is not recommended.
Q: How long does it take for bean bag filling to dry after washing?
A: It can take several days for the beads to dry completely, depending on the weather and humidity.
Q: Can I use a hairdryer to speed up the drying process?
A: Avoid using a hairdryer, as the heat can melt or warp the beads.
Q: What if my bean bag still smells after cleaning?
A: Try the disinfecting method with isopropyl alcohol. If the odor persists, you may need to replace the filling.
Get Your Bean Bag Working Again
By following these steps, you can effectively clean your bean bag filling and restore its comfort and freshness. Remember to choose the method that best suits the condition of your bean bag and prioritize thorough drying to prevent mildew growth.
Have you successfully cleaned your bean bag filling? Share your experience and any tips you have in the comments below!


