
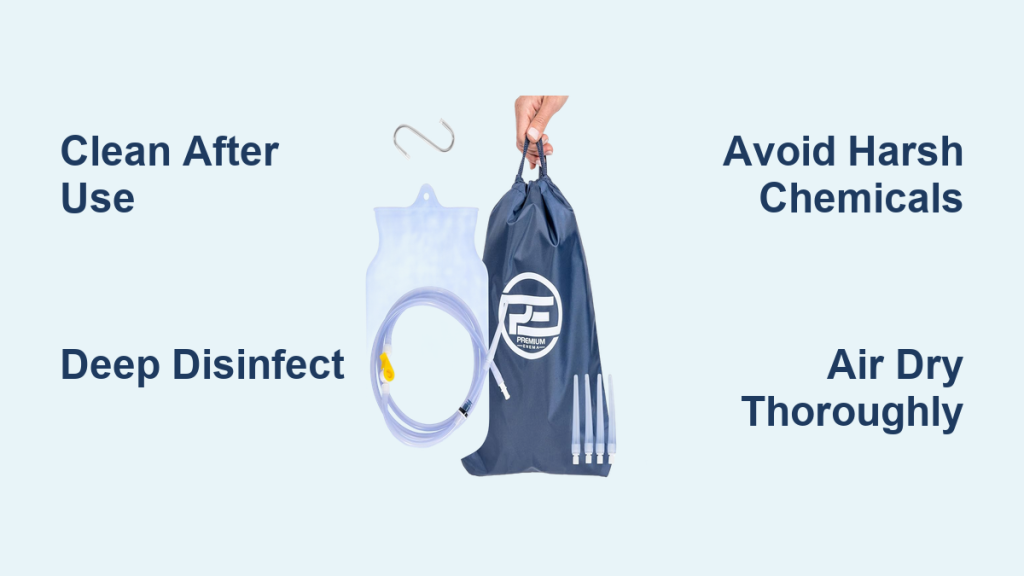
Dealing with a dirty enema bag is unpleasant, but crucial for hygiene and safe use. A poorly cleaned bag can harbor bacteria, leading to infection or discomfort. This guide will walk you through a comprehensive cleaning process for your silicone enema bag, from a quick rinse to a deep disinfection, ensuring you can confidently and safely continue your routine. We’ll start with a simple daily rinse to prevent buildup and then move on to more thorough cleaning methods.
This article will cover everything you need to know to keep your silicone enema bag clean and sanitary. We’ll detail daily maintenance, deep cleaning procedures, stain removal techniques, proper storage, and even address potential issues you might encounter. By the end of this guide, you’ll have the knowledge and confidence to maintain a hygienic enema experience.
Daily Maintenance: Quick Rinse & Flush
Regular, quick maintenance is the best way to prevent buildup and make deep cleaning easier.
- After Each Use: Immediately after each use, empty the bag completely.
- Initial Rinse: Rinse the bag thoroughly with cool, clean water. This removes the majority of the solution and prevents residue from drying.
- Flush with Water: Fill the bag with cool, clean water and gently swish it around, ensuring all surfaces are contacted. Empty again. Repeat this flush 2-3 times.
- Air Dry: Hang the bag upside down in a clean, well-ventilated area to air dry completely. Avoid direct sunlight, which can degrade the silicone.
Deep Cleaning Methods for Silicone Enema Bags
While daily rinsing is essential, a deep cleaning should be performed regularly – at least once a week, or more frequently with heavy use.
Method 1: Soap and Water Deep Clean
This is the most common and effective method for routine deep cleaning.
Diagnosing the Issue
Visually inspect the bag for any visible residue, discoloration, or biofilm. If present, extra attention will be needed during cleaning.
Fix Steps
- Disassemble: Detach the nozzle and clamp from the bag.
- Wash with Mild Soap: Fill a basin with lukewarm water and add a small amount of mild, unscented soap (like dish soap designed for baby bottles).
- Immerse and Agitate: Submerge the bag and all components (nozzle, clamp) in the soapy water. Gently agitate the bag, ensuring the soapy water reaches all interior surfaces.
- Scrub (if needed): For stubborn residue, use a soft-bristled bottle brush or a silicone-safe cleaning brush to gently scrub the interior. Avoid abrasive brushes as they can damage the silicone.
- Rinse Thoroughly: Rinse the bag and components repeatedly with cool, clean water until all traces of soap are removed.
- Disinfect (Optional): See the “Disinfection Options” section below.
- Air Dry: Hang upside down to air dry completely.
Testing
Ensure no soap residue remains by smelling the bag after drying. If a soapy scent persists, repeat the rinsing process.
Method 2: Vinegar and Baking Soda Soak
This method is useful for removing stubborn stains or odors.
Diagnosing the Issue
This method is best for bags with discoloration or lingering odors that soap and water haven’t removed.
Fix Steps
- Prepare Solution: Mix 1 cup of white vinegar with 1 tablespoon of baking soda in a basin. This will fizz – do this in a large enough basin to prevent overflow.
- Immerse and Soak: Submerge the bag and components in the vinegar/baking soda solution.
- Soak Time: Allow the bag to soak for at least 30 minutes, or up to a few hours for particularly stubborn issues.
- Rinse Thoroughly: Rinse the bag and components thoroughly with cool, clean water until all traces of vinegar and baking soda are removed.
- Disinfect (Optional): See the “Disinfection Options” section below.
- Air Dry: Hang upside down to air dry completely.
Testing
Smell the bag after drying. The vinegar smell should dissipate completely after rinsing.
Method 3: Hydrogen Peroxide Rinse
Hydrogen peroxide offers additional disinfection. Use with caution, as prolonged exposure can degrade silicone.
Diagnosing the Issue
Use this method when you suspect bacterial contamination or want extra assurance of cleanliness.
Fix Steps
- Prepare Solution: Dilute 3% hydrogen peroxide with an equal amount of cool, clean water.
- Rinse: Fill the bag with the diluted hydrogen peroxide solution and swish gently.
- Soak Time: Allow the solution to sit in the bag for no more than 15 minutes.
- Rinse Thoroughly: Rinse the bag extremely thoroughly with cool, clean water to remove all traces of hydrogen peroxide. Repeat rinsing multiple times.
- Air Dry: Hang upside down to air dry completely.
Testing
Ensure there’s absolutely no residual hydrogen peroxide smell.
Disinfection Options
For extra hygiene, consider these disinfection methods after cleaning with soap and water or vinegar/baking soda.
- Boiling (not recommended for all bags): Check your bag’s manufacturer instructions. Some silicone bags can withstand brief boiling. If allowed, boil the bag and components for 5-10 minutes. Allow to cool completely before handling.
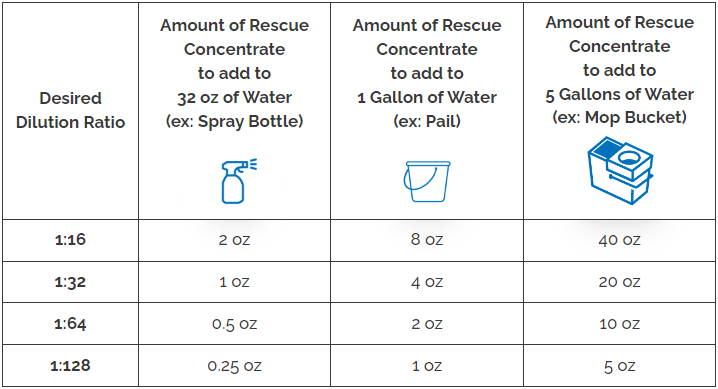
- Medical-Grade Disinfectant: Use a disinfectant specifically designed for medical equipment and silicone. Follow the manufacturer’s instructions carefully.
- UV Sanitizer: A UV sanitizer designed for baby bottles or medical equipment can be used to disinfect the bag.
Pro Tips for Silicone Enema Bag Care

- Dedicated Brush: Keep a dedicated soft-bristled brush specifically for cleaning your enema bag.
- Avoid Abrasives: Never use abrasive cleaners, scouring pads, or harsh chemicals, as these can damage the silicone.
- Inspect Regularly: Regularly inspect the bag for cracks, tears, or discoloration. Replace the bag if any damage is found.
- Storage Matters: Store the bag in a clean, dry, dust-free environment, away from direct sunlight and extreme temperatures. Consider storing it in a breathable bag or container.
- Nozzle Care: Pay special attention to cleaning the nozzle, as it’s a prime location for bacterial buildup.
When to Seek Professional Advice
- Persistent Odors: If you can’t eliminate unpleasant odors despite repeated cleaning attempts.
- Visible Mold or Mildew: If you notice any signs of mold or mildew growth.
- Silicone Degradation: If the silicone becomes sticky, cracked, or discolored.
- Unexplained Irritation: If you experience any irritation or discomfort after using the cleaned bag.
FAQ
Q: Can I put my silicone enema bag in the dishwasher?
A: Generally, no. While some manufacturers may state dishwasher safety, the high heat can degrade the silicone over time. Hand washing is always the safest option.
Q: How often should I replace my enema bag?
A: Replace your bag every 6-12 months, or sooner if you notice any signs of damage or degradation.
Q: Can I use bleach to clean my enema bag?
A: No. Bleach is too harsh and can damage the silicone, leaving harmful residue.
Q: My bag still smells after cleaning. What am I doing wrong?
A: You may not be rinsing thoroughly enough, or the odor may be deeply embedded. Try the vinegar and baking soda soak method.
Keep Your Silicone Enema Bag Running Smoothly
By following these comprehensive cleaning instructions, you can ensure your silicone enema bag remains hygienic, safe, and ready for use. Remember that consistent daily maintenance and regular deep cleaning are key to preventing buildup and maintaining optimal performance.
Have you found a particular cleaning method most effective for your bag? Share your tips and experiences in the comments below to help other readers!


