Do you love your vintage Coach bag but are hesitant to clean it, fearing you’ll damage its delicate leather? It’s a common worry! Maintaining the beauty of a vintage Coach bag can seem daunting, but with the right approach, you can restore its luster and protect it for years to come. A simple wipe down with a gentle leather cleaner can often breathe new life into your cherished bag.
This comprehensive guide will walk you through everything you need to know about cleaning your vintage Coach leather bag, from identifying the leather type to choosing the right products and techniques. We’ll cover everything from basic dusting to tackling stubborn stains, and provide preventative care tips to keep your bag looking its best. By the end of this article, you’ll feel confident in your ability to safely and effectively clean your treasured Coach bag.
Identifying Your Vintage Coach Leather

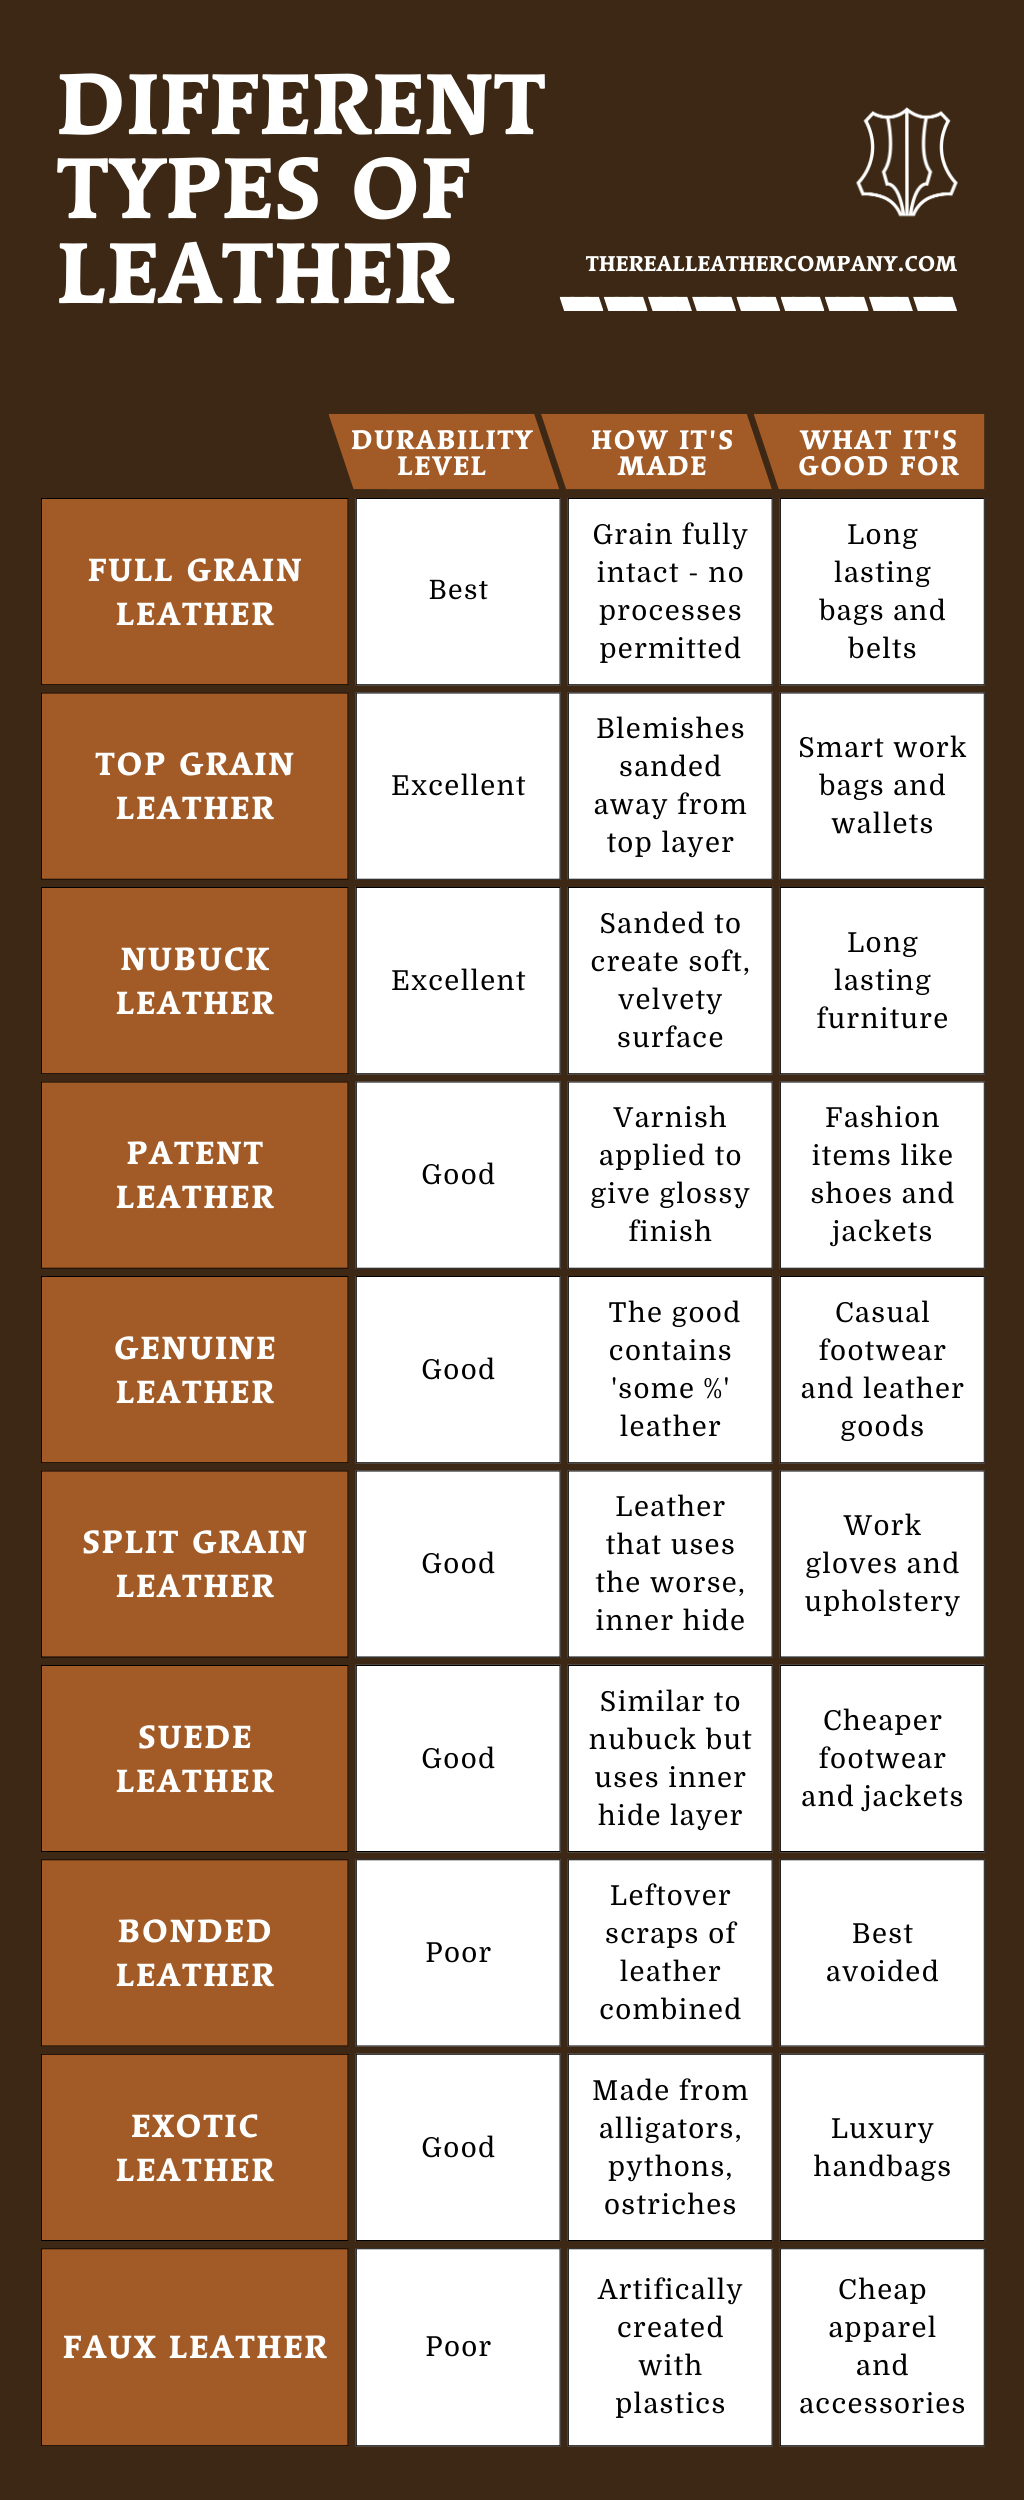
Before you begin, it’s crucial to identify the type of leather your bag is made from. Coach used several different types of leather over the years, each requiring slightly different care.
- Pebbled Leather: The most common type, characterized by its small, consistent textured pattern. Durable and relatively easy to clean.
- Smooth Leather: Has a more refined, polished look. More susceptible to scratches and requires gentle cleaning.
- Suede/Glove Leather: Soft and velvety, highly susceptible to water damage and stains. Requires specialized suede/glove leather cleaners.
- Patent Leather: Shiny and glossy. Prone to cracking if not properly maintained.
- Vegetable Tanned Leather: Develops a rich patina over time. Requires careful cleaning to preserve its natural character.
If you’re unsure, check the hangtag or interior lining for clues. If those aren’t available, a small, inconspicuous test area is always recommended before applying any cleaner.
Materials and Tools You’ll Need
| Item | Quantity | Specifications |
|---|---|---|
| Soft Microfiber Cloths | 3-5 | Lint-free, various sizes |
| Leather Cleaner | 1 | Specifically formulated for the leather type |
| Leather Conditioner | 1 | To restore moisture after cleaning |
| Soft-Bristled Brush | 1 | For removing dust and dirt from crevices |
| Distilled Water | As needed | For diluting cleaner (if necessary) |
| Cotton Swabs | Several | For cleaning tight areas |
| Saddle Soap (Optional) | 1 | For heavily soiled bags (use with caution) |
| Leather Protector Spray (Optional) | 1 | To add a protective layer |
Step-by-Step Cleaning Process
Phase 1: Preparation
- Empty the Bag: Remove all contents from your bag and shake out any loose debris.
- Dusting: Use a soft-bristled brush to gently remove dust and dirt from the exterior of the bag, paying attention to seams, pockets, and hardware.
- Surface Test: Apply a small amount of cleaner to an inconspicuous area (like the bottom corner) and observe for any adverse reactions (discoloration, damage). Wait 24 hours before proceeding if unsure.
Phase 2: Cleaning the Leather
- Apply Cleaner: Apply a small amount of leather cleaner to a clean microfiber cloth. Never apply cleaner directly to the bag.
- Gentle Wipe: Gently wipe the leather in a circular motion, working in small sections. Avoid excessive pressure.
- Crevice Cleaning: Use cotton swabs dipped in cleaner to reach tight areas like seams, hardware attachments, and around closures.
- Remove Excess Cleaner: Wipe away any remaining cleaner with a clean, damp (not wet!) microfiber cloth.
Phase 3: Conditioning the Leather
- Apply Conditioner: Apply a small amount of leather conditioner to a clean microfiber cloth.
- Even Distribution: Gently rub the conditioner into the leather in a circular motion, ensuring even coverage.
- Buffing: Allow the conditioner to absorb for 15-20 minutes, then buff with a clean, dry microfiber cloth to restore shine and suppleness.
Phase 4: Hardware Cleaning
- Mild Soap Solution: Mix a small amount of mild dish soap with warm water.
- Gentle Wipe: Dip a soft cloth into the solution and gently wipe the hardware.
- Dry Thoroughly: Dry the hardware with a clean, dry cloth to prevent water spots.
Dealing with Specific Stains

- Ink: Blot immediately with a clean cloth. Use a leather ink remover specifically designed for the leather type.
- Oil/Grease: Sprinkle cornstarch or baking soda on the stain and let it sit overnight. Brush off in the morning. Repeat if necessary.
- Water Spots: Gently wipe with a damp cloth and allow to air dry. Apply leather conditioner afterward.
- Dark Marks/Discoloration: A professional leather cleaner may be needed. Avoid harsh chemicals.
Pro Tips for Vintage Coach Care
- Regular Dusting: Dust your bag weekly to prevent dirt buildup.
- Avoid Direct Sunlight: Prolonged exposure to sunlight can fade and dry out the leather.
- Proper Storage: Store your bag in a dust bag in a cool, dry place. Stuff it with acid-free tissue paper to maintain its shape.
- Rotate Your Bags: Don’t use the same bag every day to allow the leather to rest.
- Avoid Overfilling: Overfilling can stretch and distort the shape of your bag.
- Handle with Care: Be mindful of sharp objects and abrasive surfaces.
- Don’t Use Baby Wipes: They often contain chemicals that can damage leather.
When to Seek Professional Help

- Extensive Damage: Deep scratches, tears, or significant discoloration.
- Stubborn Stains: Stains that won’t lift with home remedies.
- Restoration Needs: If your bag requires significant restoration work, such as color correction or hardware repair.
- Uncertainty: If you are unsure about the leather type or cleaning process.
Look for a reputable leather repair specialist with experience in vintage bags. Expect to pay anywhere from $50 to $300+ depending on the extent of the repair. Always ask for a quote before authorizing any work.
FAQ
Q: Can I use saddle soap on all types of Coach leather?
A: No. Saddle soap is very effective for heavily soiled, durable leathers like pebbled leather, but it can be too harsh for delicate leathers like suede or glove leather. Always test in an inconspicuous area first.
Q: How often should I condition my vintage Coach bag?
A: It depends on the climate and how often you use the bag. Generally, conditioning every 3-6 months is sufficient. If the leather feels dry or stiff, condition it more frequently.
Q: What’s the best way to store a vintage Coach bag long-term?
A: Store it in a dust bag in a cool, dry, and dark place. Stuff it with acid-free tissue paper to maintain its shape. Avoid plastic bags, as they can trap moisture.
Q: Is it safe to use a leather protector spray?
A: Yes, a leather protector spray can help repel water and stains, but choose a product specifically designed for the leather type and follow the instructions carefully.
Keep Your Vintage Coach Bag Running Smoothly
By following these steps, you can ensure your vintage Coach bag remains a treasured possession for generations to come. Remember to identify the leather type, use gentle cleaning methods, and prioritize preventative care. A little effort can go a long way in preserving the beauty and value of your cherished bag.
Have you successfully cleaned your vintage Coach bag? Share your experiences and tips in the comments below!


