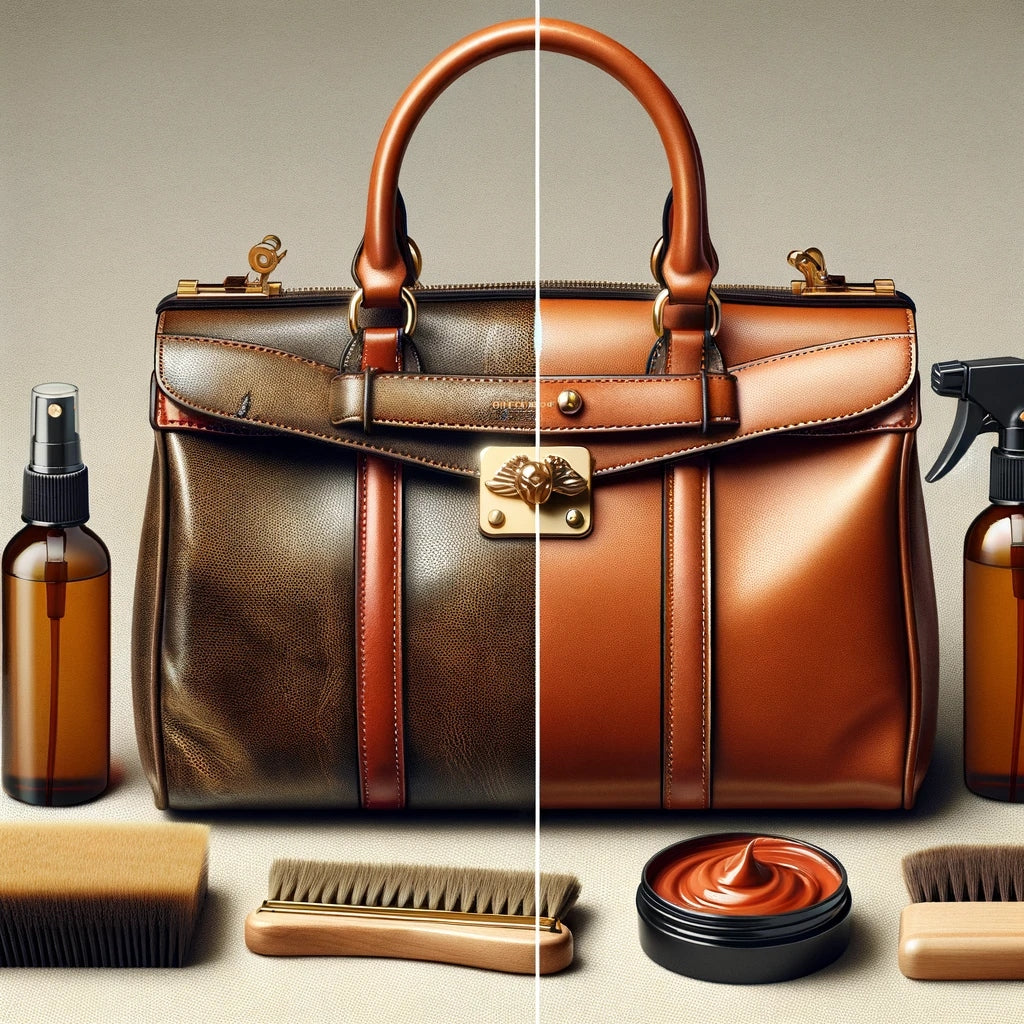
Do you have a beautiful vintage leather bag that’s looking a little worse for wear? Seeing cracks, stains, or a dull finish can be disheartening, but don’t despair! Often, a little gentle cleaning can restore its luster and protect it for years to come. A quick wipe-down with a damp cloth can sometimes be enough to refresh the leather.
This comprehensive guide will take you beyond a simple wipe-down, providing a step-by-step approach to cleaning your vintage leather bag safely and effectively. We’ll cover everything from identifying the leather type to tackling stubborn stains, and finally, protecting your investment for the future. By the end of this article, you’ll have the knowledge and confidence to breathe new life into your treasured bag.
Understanding Your Vintage Leather

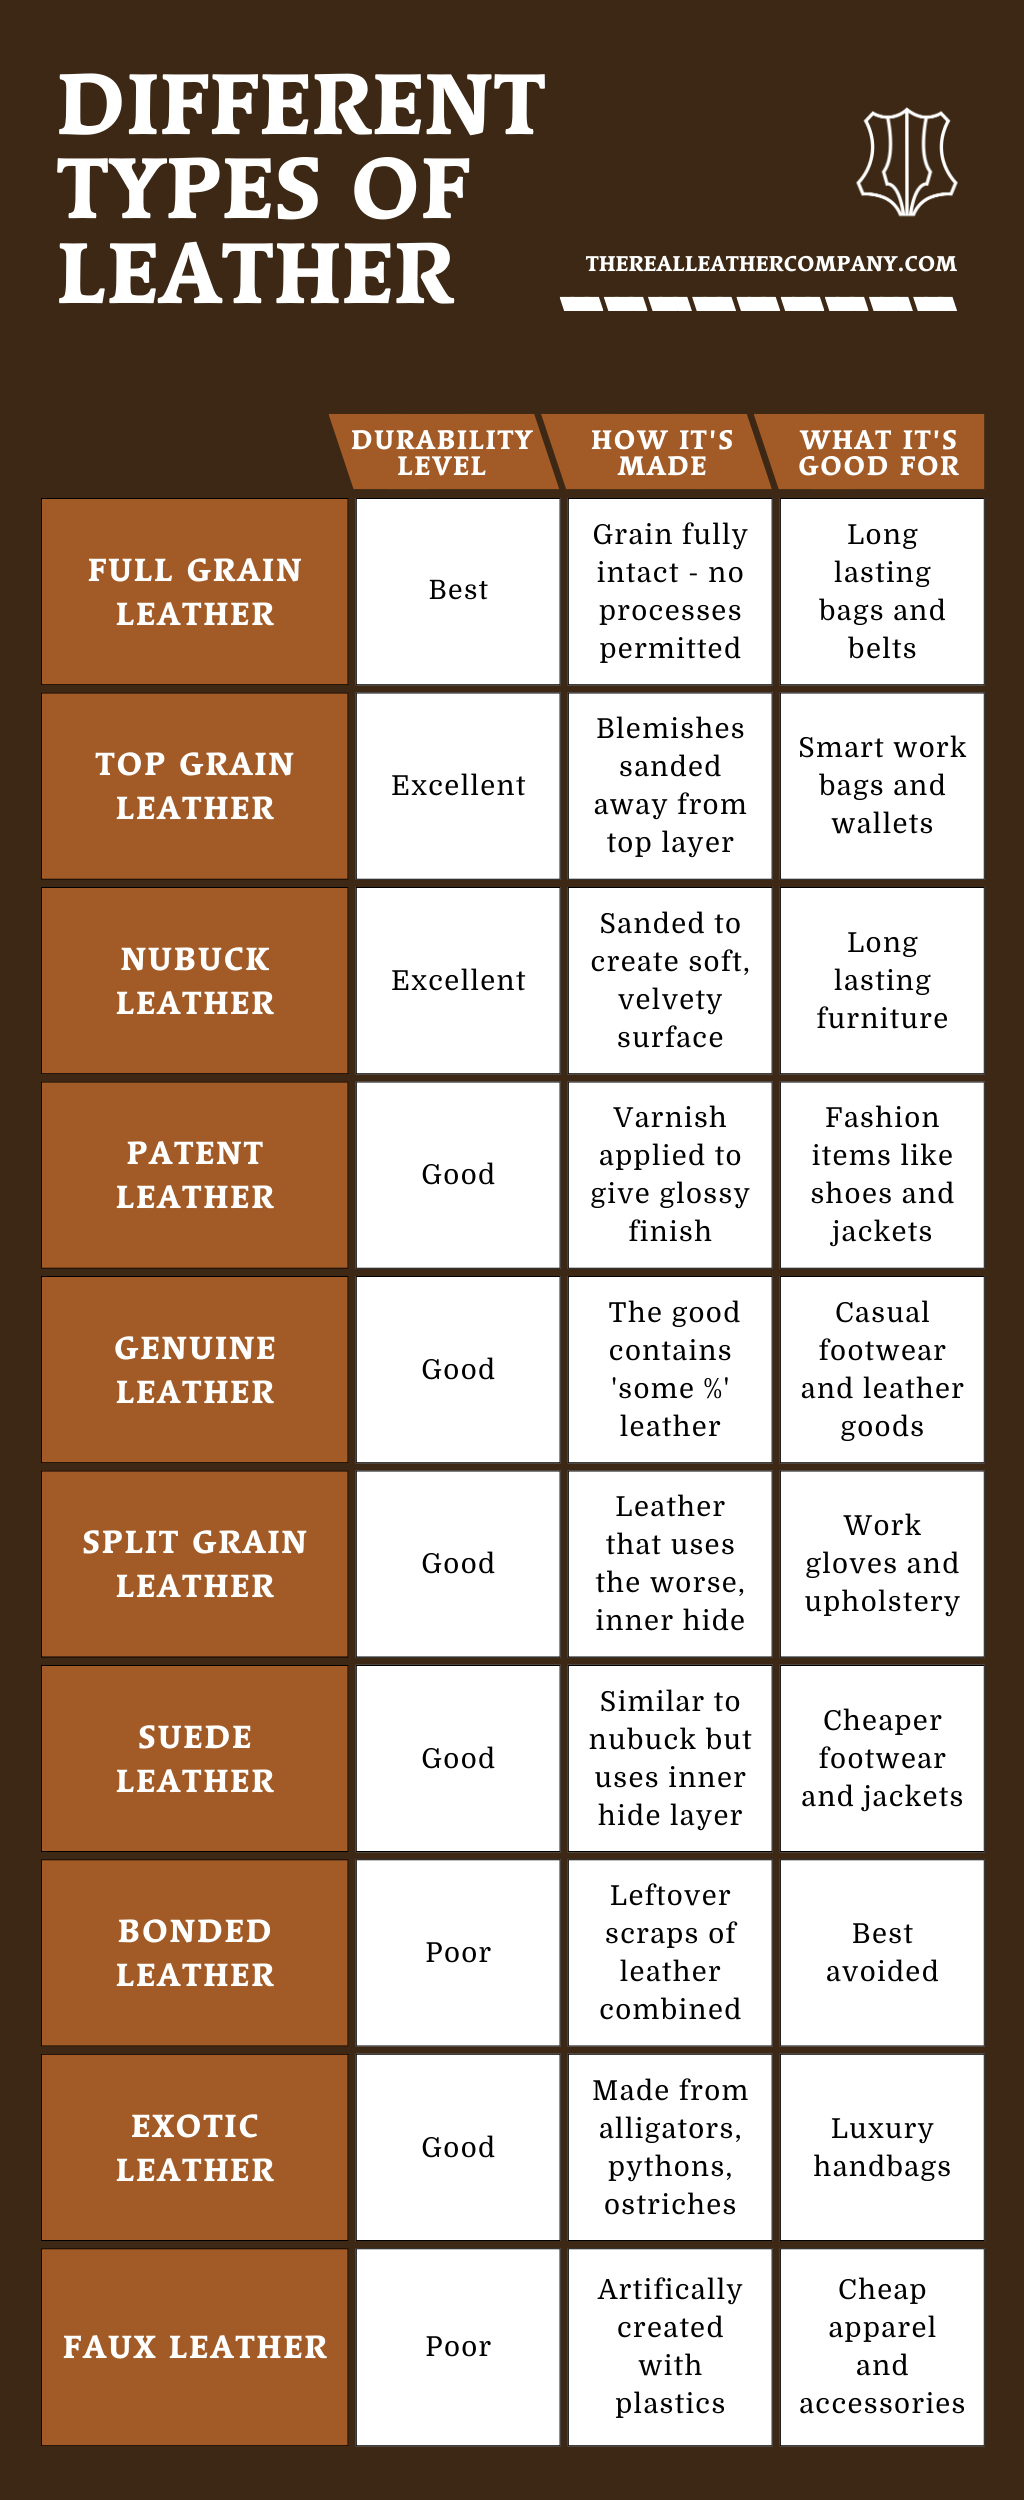
Before diving into cleaning, it’s crucial to understand the type of leather your bag is made from. Different leathers require different care.
Identifying Leather Types
- Full-Grain Leather: The highest quality, durable, and develops a beautiful patina over time. Requires gentle cleaning.
- Top-Grain Leather: Slightly sanded to remove imperfections, making it more uniform. Still durable but less resistant to wear than full-grain.
- Corrected-Grain Leather: Heavily sanded and often embossed to create a uniform appearance. More susceptible to damage.
- Suede/Nubuck: Soft, velvety texture. Requires specialized cleaning products and techniques.
- Patent Leather: Coated for a glossy finish. Prone to cracking and requires gentle cleaning to avoid damage.
Testing for Colorfastness
Always test any cleaning product on an inconspicuous area (like the inside bottom) before applying it to the entire bag. Apply a small amount, let it sit for a few minutes, and blot with a clean cloth. If color transfers to the cloth, proceed with extreme caution or consult a professional.
Gathering Your Cleaning Supplies
Having the right tools on hand will make the cleaning process much smoother.
| Item | Quantity | Specifications |
|---|---|---|
| Soft Microfiber Cloths | 3-5 | Lint-free |
| Leather Cleaner | 1 Bottle | Specifically formulated for leather (avoid harsh chemicals) |
| Leather Conditioner | 1 Bottle | To rehydrate and protect the leather |
| Soft-Bristled Brush | 1 | For removing dust and dirt from crevices |
| Distilled Water | As needed | Avoids mineral deposits |
| Saddle Soap (Optional) | 1 Bar | For heavily soiled leather (use with caution) |
| Leather Protector Spray | 1 Can | To create a protective barrier against future stains |
Step-by-Step Cleaning Process
Now, let’s get cleaning! This process is suitable for most vintage leather bags, but always test products first.
Phase 1: Preparation
Dust and Debris Removal
- Empty the bag completely.
- Use a soft-bristled brush to gently remove loose dust and dirt from the exterior and interior. Pay attention to seams, pockets, and hardware.
- Use a vacuum with a brush attachment on low suction to remove dust from hard to reach areas.
Phase 2: Gentle Cleaning
Leather Cleaner Application
- Dampen a microfiber cloth with distilled water.
- Apply a small amount of leather cleaner to the damp cloth (not directly onto the bag).
- Gently wipe the entire surface of the bag in circular motions. Work in small sections.
- Use a clean, damp cloth to wipe away any remaining cleaner residue.
- Allow the bag to air dry completely away from direct heat or sunlight.
Phase 3: Conditioning and Protection
Leather Conditioner Application
- Apply a small amount of leather conditioner to a clean microfiber cloth.
- Gently massage the conditioner into the leather in circular motions.
- Allow the conditioner to absorb for 15-30 minutes.
- Buff the bag with a clean, dry microfiber cloth to remove any excess conditioner and restore shine.
Leather Protector Spray
- In a well-ventilated area, apply a thin, even coat of leather protector spray.
- Allow the spray to dry completely before using the bag.
Tackling Specific Stains
:max_bytes(150000):strip_icc()/remove-ink-from-leather-6274276-hero-03-bc994767735e4ac4b1cd9ea56cf3f62c.jpg)
Sometimes, gentle cleaning isn’t enough. Here’s how to address common stains:
Ink Stains
- Mild Ink: Try dabbing the stain with a cotton swab dipped in rubbing alcohol. Test in an inconspicuous area first!
- Stubborn Ink: Consult a professional leather cleaner.
Water Stains
- Gently blot the stain with a clean, dry cloth.
- Allow the bag to air dry completely.
- Apply leather conditioner to rehydrate the leather.
Grease Stains
- Sprinkle cornstarch or talcum powder onto the stain.
- Let it sit overnight to absorb the grease.
- Brush off the powder with a soft-bristled brush.
Mold/Mildew
- Wipe the affected area with a cloth dampened with a solution of equal parts distilled water and rubbing alcohol.
- Allow to air dry completely.
Pro Tips for Vintage Leather Care

- Regular Dusting is Key: Weekly dusting prevents dirt buildup and keeps your bag looking its best.
- Avoid Harsh Chemicals: Never use abrasive cleaners, bleach, or ammonia on leather.
- Store Properly: Store your bag in a dust bag in a cool, dry place away from direct sunlight.
- Stuff the Bag: When storing, stuff the bag with acid-free tissue paper to maintain its shape.
- Rotate Your Bags: Don’t use the same bag every day. Rotating your bags allows the leather to rest and recover.
- Handle with Clean Hands: Oils from your hands can transfer to the leather and cause staining.
- Consider a Professional Clean: For heavily soiled or delicate bags, a professional cleaning is always the safest option.
When to Seek Professional Help
- Deep, set-in stains that you can’t remove yourself.
- Damage to the leather, such as cracks or tears.
- Suspected colorfastness issues.
- If you’re unsure about the leather type or cleaning method.
FAQ
Q: How often should I clean my vintage leather bag?
A: It depends on how often you use it. A light dusting weekly and a thorough cleaning every 6-12 months is a good starting point.
Q: Can I use baby wipes to clean my leather bag?
A: Avoid using baby wipes, as they often contain chemicals that can damage the leather.
Q: What’s the best way to store a vintage leather bag?
A: Store it in a dust bag in a cool, dry place, stuffed with acid-free tissue paper to maintain its shape.
Q: Will leather conditioner darken the color of my bag?
A: It can slightly darken the color, especially on lighter leathers. Test in an inconspicuous area first.
Alternative Solutions
If you’re hesitant to use commercial leather cleaners, you can try a DIY solution of equal parts distilled water and mild castile soap. However, always test this solution in an inconspicuous area first. Another option for heavily soiled leather is saddle soap, but use it sparingly as it can be drying.
Keep Your Vintage Leather Bag Running Smoothly
By following these steps, you can keep your vintage leather bag looking beautiful for years to come. Remember to identify the leather type, test products first, and handle with care. Regular maintenance and proper storage are essential for preserving its beauty and value.
Have you successfully cleaned your vintage leather bag using these tips? Share your experience and any additional advice in the comments below!


