
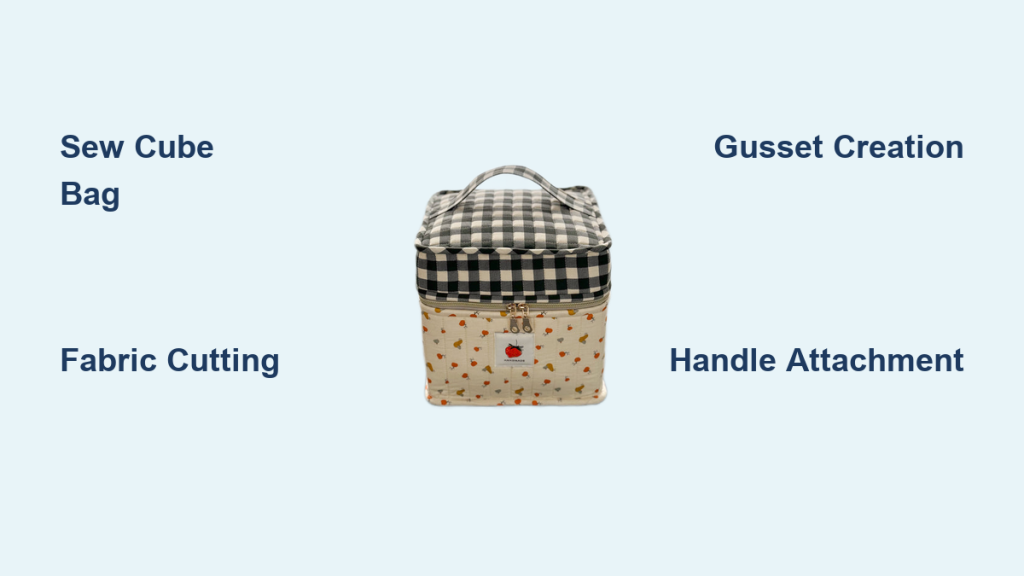
Frustrated with flimsy tote bags that can’t stand on their own? A cube bag offers a stylish and practical solution, providing a structured base perfect for shopping, picnics, or everyday carry. This guide will walk you through creating your own cube bag, starting with a quick overview and then diving into a detailed, step-by-step process.
This comprehensive guide isn’t just about sewing a cube bag; it’s about mastering the technique to create a durable, versatile accessory. We’ll cover everything from fabric selection and cutting to assembling the cube base, handles, and optional pockets. By the end, you’ll be confidently crafting cube bags in various sizes and fabrics.
What You’ll Need for Sewing a Cube Bag
| Item | Quantity | Specifications |
|---|---|---|
| Fabric (Outer) | 1 yard | Durable woven fabric like canvas, denim, or duck cloth |
| Fabric (Lining) | 1 yard | Lightweight cotton or quilting fabric |
| Interfacing (Fusible) | 1 yard | Medium-weight interfacing for structure |
| Webbing (Handles) | 2 yards | 1″ or 1.5″ wide webbing |
| Thread | 1 spool | Matching outer fabric color |
| Scissors | 1 | Fabric scissors |
| Rotary Cutter & Mat | 1 set | For precise cutting (optional) |
| Ruler | 1 | Quilting ruler or measuring tape |
| Pins | 1 box | Straight pins |
| Iron & Ironing Board | 1 | For fusing interfacing and pressing seams |
| Sewing Machine | 1 | With standard presser foot |
| Seam Ripper | 1 | For correcting mistakes |
Preparing Your Fabric & Pattern

Understanding the Cube Bag Construction
A cube bag’s structure comes from the base, which is essentially a box-shaped bottom. This base is created by sewing gussets into the corners of the bag. The sides and lining are then attached to this base.
Cutting the Fabric Pieces
For a finished bag approximately 12” wide x 12” deep x 10” high (adjust measurements as desired), cut the following pieces:
- Base: Two squares, 12″ x 12″ (outer fabric & interfacing)
- Side Panels: Two rectangles, 12″ x 10″ (outer fabric & interfacing)
- End Panels: Two rectangles, 12″ x 10″ (outer fabric & interfacing)
- Lining: Two squares, 12″ x 12″ (lining fabric)
- Lining Side Panels: Two rectangles, 12″ x 10″ (lining fabric)
- Lining End Panels: Two rectangles, 12″ x 10″ (lining fabric)
- Handles: Two strips, 24″ long (webbing)
Important: Remember to add a ½” seam allowance to all cut pieces.
Fusing the Interfacing
Apply fusible interfacing to the wrong side of the outer fabric pieces (base, side panels, and end panels). This will give the bag its structure. Follow the manufacturer’s instructions for fusing.
Step-by-Step Construction Process
Phase 1: Creating the Cube Base
- Prepare the Gussets: On the wrong side of each base square, mark a 2″ x 2″ square in each corner.
- Sew the Gussets: Fold each corner diagonally to form a triangle, with raw edges aligned. Sew along the folded edge with a ½” seam allowance.
- Trim & Finish: Trim the excess fabric from the corners, leaving ¼” seam allowance.
- Repeat: Repeat steps 1-3 for the second base square.
Phase 2: Assembling the Outer Bag
- Attach Side Panels: With right sides together, pin one side panel to one base piece, aligning the edges. Sew along the edge with a ½” seam allowance. Repeat with the other side panel.
- Attach End Panels: Pin one end panel to the assembled base and side panels, aligning the edges. Sew with a ½” seam allowance. Repeat with the other end panel. You now have the basic cube shape.
- Press Seams: Press all seams open for a clean finish.
Phase 3: Constructing the Lining
- Assemble Lining Pieces: Repeat steps 1 & 2 from Phase 2, using the lining fabric pieces. Do not add gussets to the lining corners.
- Leave an Opening: On the lining, leave a 4″-6″ opening along the bottom seam for turning the bag right side out.
Phase 4: Combining Outer Bag & Lining
- Insert Lining: Place the lining inside the outer bag, with right sides together.
- Pin & Sew: Pin around the top edge of the bag, aligning the outer fabric and lining. Sew with a ½” seam allowance, leaving the opening in the lining unsewn.
- Turn Right Side Out: Carefully turn the bag right side out through the opening in the lining.
- Close the Opening: Hand-stitch the opening in the lining closed.
- Push Lining In: Push the lining neatly inside the outer bag.
Phase 5: Adding the Handles
- Position Handles: Measure and mark the desired handle placement on the outer bag. Typically, handles are placed 3″-4″ from the side seams.
- Secure Handles: Pin the ends of the webbing handles to the bag, reinforcing with multiple pins.
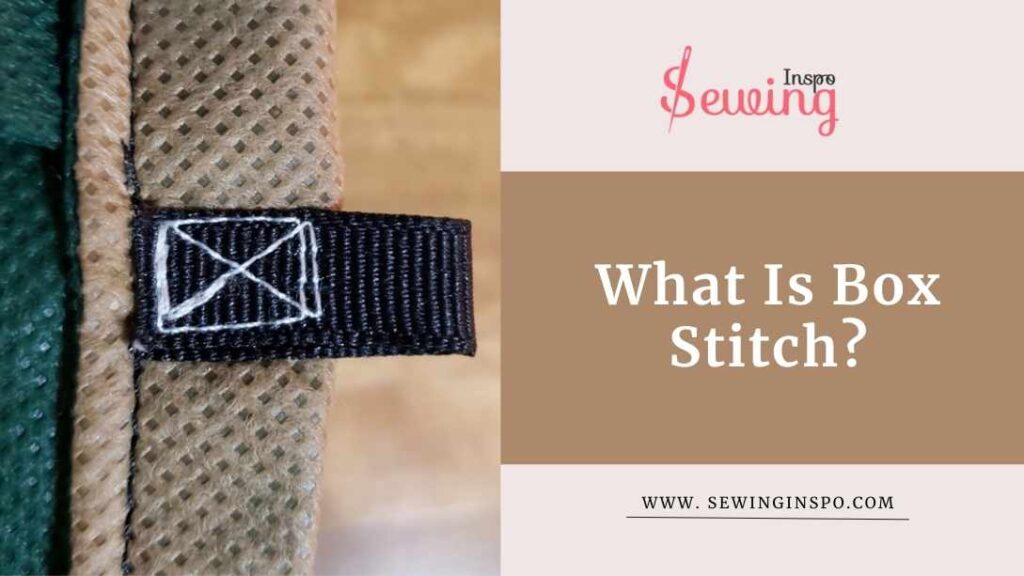
- Sew Handles: Sew the handles securely to the bag with a box stitch or multiple rows of stitching for extra strength.
Pro Tips for a Perfect Cube Bag
- Fabric Choice: Use a heavier-weight fabric for better structure. Canvas, denim, and duck cloth are excellent choices.
- Interfacing is Key: Don’t skip the interfacing! It provides the necessary stiffness to hold the cube shape.
- Reinforce Handles: Securely attaching the handles is crucial. Use a box stitch or multiple rows of stitching for durability.
- Topstitching: Topstitching around the top edge of the bag adds a professional finish and reinforces the seam.
- Adding Pockets: Incorporate interior or exterior pockets for added functionality.
Professional Help
If you’re struggling with the sewing process, especially the gussets or handle attachment, consider seeking help from a local seamstress or sewing class. A professional can provide personalized guidance and ensure a high-quality finish. Typical costs for minor repairs or assistance range from $20-$50 per hour.
FAQ
Q: Can I use a different type of handle?
A: Yes! You can use leather handles, rope handles, or even fabric straps instead of webbing. Adjust the attachment method accordingly.
Q: What size base should I cut for a larger bag?
A: Increase the base dimensions proportionally to the desired bag size. Add extra height to the side and end panels if you want a taller bag.
Q: My bag isn’t holding its shape. What did I do wrong?
A: Likely, you didn’t use enough interfacing or a heavy enough fabric. Ensure the interfacing is properly fused and consider adding a layer of heavier fabric for extra stability.
Q: Can I add a zipper closure?
A: Absolutely! Install a zipper along the top edge of the bag after attaching the lining.
Alternative Solutions

If you’re uncomfortable sewing the gussets, you can consider a simpler tote bag pattern with a flat bottom. While it won’t have the same structured cube shape, it’s a quicker and easier project. Alternatively, pre-made cube bag bases can be purchased online, simplifying the construction process.
| Solution | Pros | Cons | Best For |
|---|---|---|---|
| Flat Bottom Tote | Easier to sew | Less structure | Beginners |
| Pre-Made Base | Saves time | Limited options | Quick projects |
Enjoy Your New Cube Bag!
Now that you’ve successfully sewn your cube bag, you can enjoy its practicality and style. This durable and versatile bag is perfect for a wide range of uses.
- You’ve mastered the art of creating a structured base.
- You’ve learned how to assemble the outer bag and lining.
- You’ve confidently attached the handles.
Don’t be afraid to experiment with different fabrics, colors, and embellishments to create unique cube bags that reflect your personal style!
Have you sewn a cube bag? Share your photos and tips in the comments below!


