
Are you tired of your delicate clothes getting wrinkled or damaged in standard luggage? Sewing your own garment bag is a fantastic solution, offering a custom fit and protective barrier for your favorite garments. A quick fix for wrinkled clothes is often a steam iron, but preventing the wrinkles in the first place with a garment bag is far more effective!
This comprehensive guide will walk you through every step of creating a professional-looking garment bag, from gathering materials to the final finishing touches. Whether you’re a beginner or an experienced sewer, this tutorial will empower you to construct a durable and stylish garment bag, ensuring your clothes arrive at their destination in pristine condition. We’ll cover different construction methods, optional features, and troubleshooting tips to ensure your success.
What You’ll Need for Garment Bag Construction
| Item | Quantity | Specifications |
|---|---|---|
| Fabric | 2 yards | Lightweight woven fabric (e.g., nylon, polyester, cotton blend) – 60” wide |
| Interfacing | 1 yard | Lightweight fusible interfacing |
| Zipper | 18-24 inches | Heavy-duty nylon zipper |
| Hanging Loop Fabric | 1/2 yard | Sturdy ribbon or fabric for loop |
| Thread | 1 spool | Matching your fabric |
| Sewing Machine | 1 | Standard sewing machine |
| Scissors | 1 pair | Fabric scissors |
| Pins | 1 box | Straight pins |
| Measuring Tape | 1 | |
| Iron & Ironing Board | 1 | |
| Seam Ripper | 1 | |
| Marking Pen/Chalk | 1 | Fabric-safe |
Preparing Your Fabric and Pattern
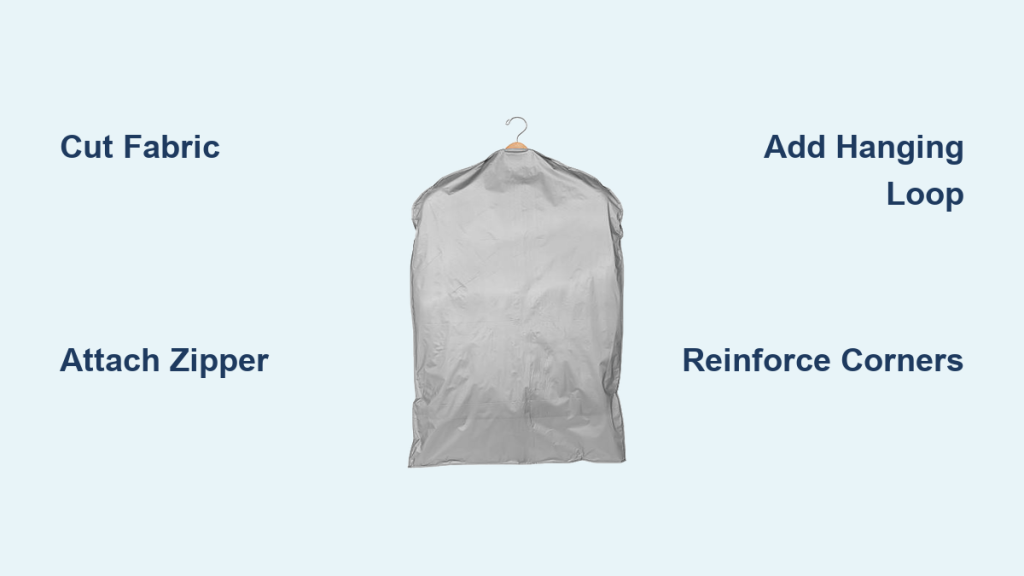
Cutting the Fabric Pieces
- Body Pieces: Cut two rectangles measuring 24″ wide x 48″ long. This will form the main body of the bag.
- Facing Pieces: Cut two rectangles measuring 24″ wide x 6″ long. These will finish the top edge.
- Hanging Loop: Cut one piece of sturdy ribbon or fabric 6″ x 2″.
- Interfacing: Cut two rectangles measuring 24″ wide x 6″ long for the facing pieces.
Applying Interfacing
- Fuse the interfacing to the wrong side of the facing pieces, following the manufacturer’s instructions. This will give the facing structure and prevent stretching.
Step-by-Step Garment Bag Construction Process

Phase 1: Preparing the Facing
- Fold & Press: Fold each facing piece in half lengthwise, with wrong sides together, and press.
- Attach to Body: Pin one facing piece along the top edge of one of the body pieces, right sides together. Repeat for the other body piece and facing.
- Stitch: Stitch the facing to the body piece with a 1/2″ seam allowance.
Phase 2: Installing the Zipper
- Prepare Zipper: If your zipper is longer than the bag width, trim it to 24 inches.
- Pin Zipper: Place the body pieces right sides together, with the zipper tape facing inward. Pin the zipper along the top edge, ensuring the zipper pull is positioned appropriately.
- Zipper Foot: Attach a zipper foot to your sewing machine.
- Stitch Zipper: Stitch the zipper to the fabric using a 1/4″ seam allowance. Backstitch at the beginning and end of the zipper to secure it.
- Understitching: Understitch the zipper tape to the facing, close to the zipper teeth. This prevents the facing from rolling to the outside.
Phase 3: Assembling the Bag
- Pin Sides & Bottom: With right sides together, pin the side and bottom edges of the bag together, leaving the zipper open.
- Stitch Sides & Bottom: Stitch along the pinned edges with a 1/2″ seam allowance, leaving a 4″ opening at the bottom for turning. Reinforce the corners with backstitching.
- Clip Corners: Clip the corners diagonally to reduce bulk.
- Turn Right Side Out: Carefully turn the bag right side out through the opening.
- Press: Press the bag, paying attention to the seams.
- Close Opening: Hand-stitch the opening closed using a blind stitch.
Phase 4: Creating the Hanging Loop
- Fold & Press: Fold the hanging loop fabric in half lengthwise, with wrong sides together, and press.
- Attach Loop: Fold the loop in half again, creating a loop. Pin the raw edges of the loop to the center of the inside top edge of the bag, between the facing and the body fabric.
- Stitch Loop: Stitch the loop securely to the bag, reinforcing the stitching several times.
Pro Tips for a Professional Finish

- Fabric Choice: Lightweight fabrics are best for minimizing bulk. Nylon or polyester are durable and water-resistant options.
- Interfacing is Key: Don’t skip the interfacing! It provides structure and prevents the facing from stretching.
- Zipper Selection: Invest in a good-quality, heavy-duty zipper. A cheap zipper can easily break or get stuck.
- Seam Finishing: For a more professional finish, consider serging or zigzag stitching the raw edges of the seams before turning the bag right side out.
- Reinforce Stress Points: Reinforce the corners and the area around the zipper pull with extra stitching.
- Topstitching: Topstitching around the zipper and facing adds a polished look and helps keep the facing in place.
- Customize: Add pockets inside the bag for shoes or accessories.
Professional Help Section
If you encounter significant difficulties with the zipper installation or find the construction too challenging, consider seeking assistance from a local tailor or seamstress. A professional can ensure a clean and durable finish. Typical costs for garment bag alterations or construction range from $30-$80, depending on the complexity and location.
FAQ Section
Q: What fabric weight should I use?
A: Lightweight woven fabrics like nylon, polyester, or a cotton blend with a weight of 2-4 oz per yard are ideal. Avoid heavy fabrics that will add unnecessary bulk.
Q: Can I use a regular zipper?
A: While possible, a heavy-duty nylon zipper is recommended for its durability and ability to withstand repeated use.
Q: How do I prevent the zipper from getting stuck?
A: Use a zipper foot, stitch slowly and carefully, and ensure the zipper teeth are aligned properly. Applying a small amount of zipper lubricant can also help.
Q: What if I don’t have interfacing?
A: The bag can still be constructed without interfacing, but the facing will be less structured and more prone to stretching.
Alternative Solutions Section
If you’re not comfortable sewing a garment bag from scratch, you can purchase pre-made garment bags online or at department stores. However, these often lack the custom fit and personalization options of a handmade bag.
| Solution | Pros | Cons | Best For |
|---|---|---|---|
| DIY Sewing | Custom fit, cost-effective, creative control | Requires sewing skills, time-consuming | Experienced sewers, personalized needs |
| Pre-made Bag | Convenient, quick, readily available | Limited customization, potentially lower quality | Beginners, immediate needs |
Enjoy Your New Garment Bag
Congratulations! You’ve successfully sewn your own garment bag. By following these steps, you’ve created a durable and stylish solution for protecting your clothes while traveling.
Here’s a quick recap:
– You learned how to cut and prepare your fabric.
– You mastered zipper installation and bag assembly.
– You added a functional hanging loop.
Now you can travel with confidence, knowing your garments will arrive wrinkle-free and ready to wear.
Share your finished garment bag with us in the comments below! We’d love to see your creations and hear about your experience.


