
Are you dreaming of a beautiful, handmade bag to carry your essentials? Sewing a quilted bag might seem daunting, but it’s a surprisingly achievable project, even for intermediate sewists. A simple patch and stitch can get you started, and this guide will walk you through the entire process, from fabric selection to finishing touches.
This comprehensive guide will take you beyond the basics, exploring different quilting techniques, lining options, and hardware choices to create a truly unique and functional quilted bag. Whether you’re a seasoned quilter or a confident beginner, you’ll gain the skills and knowledge to confidently tackle this rewarding project and create a bag you’ll cherish for years to come.
Materials and Tools Needed
| Item | Quantity | Specifications |
|---|---|---|
| Quilting Cotton Fabric | Varies | Fat Quarters or Yardage (for exterior, lining, and binding) |
| Batting | 1 Yard | Cotton, Polyester, or Blend (loft depends on desired bag structure) |
| Interfacing | 1 Yard | Fusible Interfacing (for structure and stability) |
| Bag Handles/Straps | 1 Pair | Leather, Chain, or Fabric (length depends on desired carry style) |
| Magnetic Snap or Button Closure | 1 | Size appropriate for bag opening |
| Zipper (Optional) | 1 | Length appropriate for a pocket or bag closure |
| Thread | 1 Spool | Coordinating color |
| Sewing Machine | 1 | Standard sewing machine |
| Rotary Cutter, Mat, and Ruler | 1 Set | For precise fabric cutting |
| Iron and Ironing Board | 1 | Essential for pressing seams |
| Pins or Clips | 1 Box/Pack | For holding fabric layers together |
| Fabric Scissors | 1 Pair | For general fabric cutting |
| Seam Ripper | 1 | For correcting mistakes |
| Walking Foot (Optional) | 1 | Helpful for quilting layers |
Preparing Your Fabric and Pattern
Choosing Your Fabrics
Select quilting cottons that complement each other in color and pattern. Consider the overall aesthetic you’re aiming for – modern, vintage, whimsical, etc. Different weights of cotton will affect the drape and structure of your bag.
Pattern Selection
There are countless free and paid quilted bag patterns available online. For this guide, we’ll assume a simple rectangular tote bag shape. You can easily adapt the dimensions to create different sizes. A basic pattern will include pieces for the bag exterior, lining, handles, and any optional pockets.
Cutting Your Fabric
Using your chosen pattern, carefully cut out all fabric pieces, including:
* Exterior Fabric: 2 pieces for the bag body, plus pieces for any exterior pockets.
* Lining Fabric: 2 pieces for the bag body, plus pieces for any lining pockets.
* Batting: 2 pieces, the same size as the exterior fabric pieces.
* Interfacing: Pieces to reinforce the exterior fabric, especially handle attachment points.
Quilting the Bag Exterior
Layering the Quilt Sandwich
Place your backing fabric (exterior) right side down. Layer with batting, then top with your quilting fabric right side up. Secure all layers with pins or clips, ensuring there are no wrinkles.
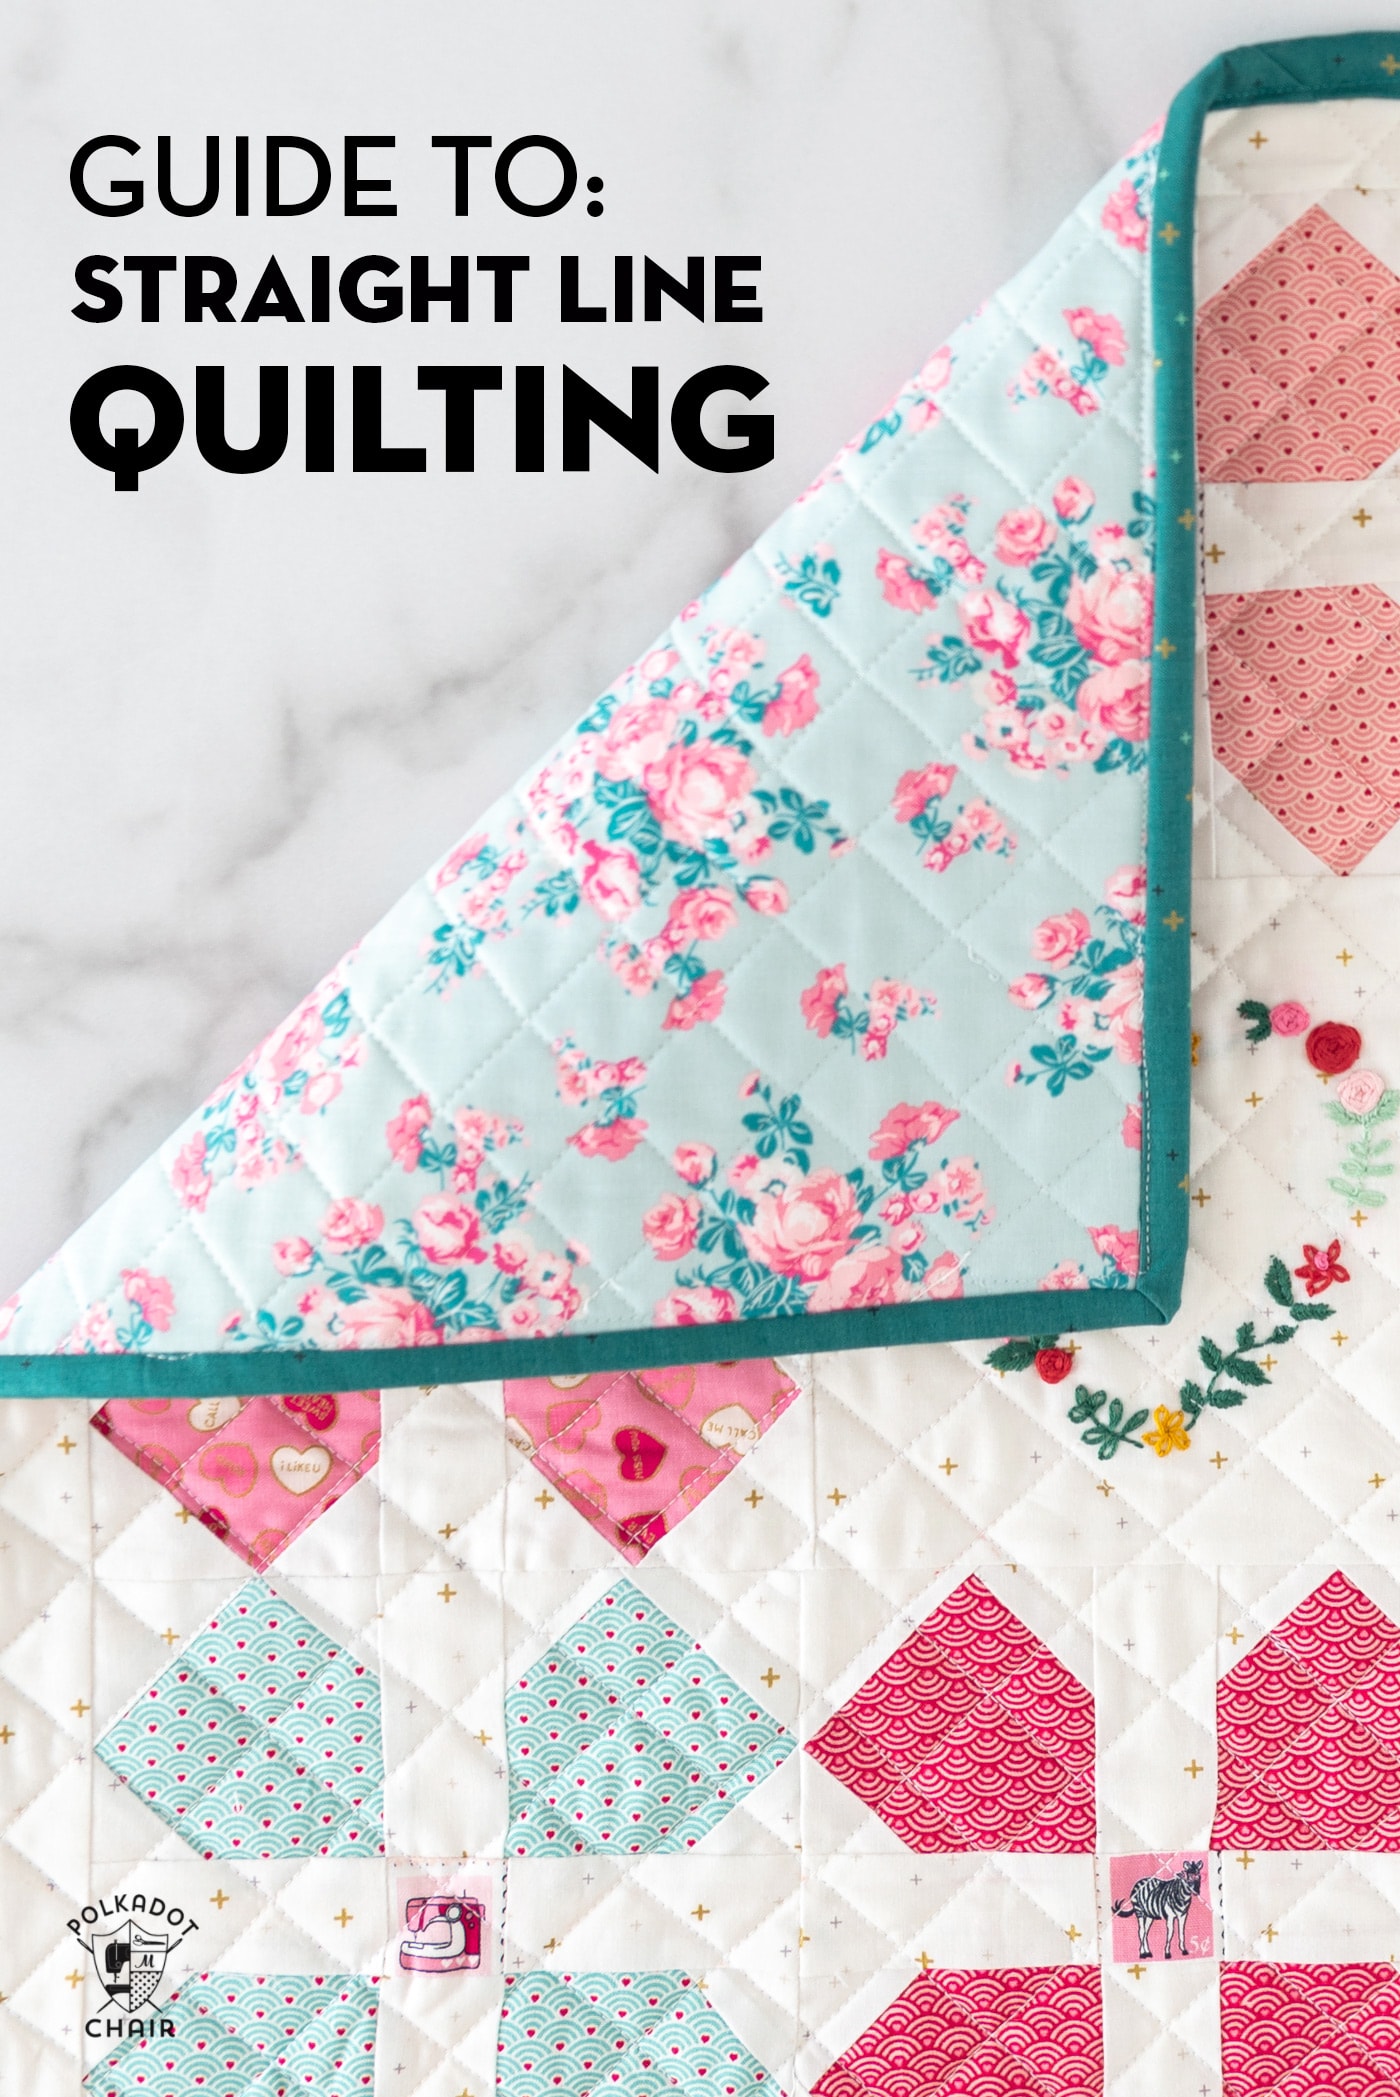
Quilting Techniques
- Straight-Line Quilting: The simplest method. Use a walking foot for even stitching. Quilt lines parallel to the edges or in a grid pattern.
- Free-Motion Quilting: Requires a darning foot and practice. Allows for creative designs and patterns.
- Echo Quilting: Stitch around shapes or motifs on the fabric.
Binding the Quilted Piece
Once quilting is complete, trim excess batting and backing. Cut strips of binding fabric (2.5 inches wide) and sew them together to create a long strip. Fold the binding in half lengthwise, wrong sides together, and press. Attach the binding to the raw edges of the quilted piece, mitering corners for a neat finish.
Constructing the Bag Body
Assembling the Exterior
With right sides together, sew the two exterior pieces along the sides and bottom, leaving the top open. Reinforce corners with triangle stitching for added durability.
Assembling the Lining
Repeat the process with the lining fabric pieces, but leave a 4-6 inch opening along the bottom seam for turning.
Attaching the Handles
Apply interfacing to the handle attachment points on the exterior of the bag. Position the handles and securely sew them in place, reinforcing the stitching multiple times.
Finishing the Bag

Joining Exterior and Lining
Place the exterior and lining layers right sides together, matching the top edges. Sew around the top opening, leaving a small gap for turning.
Turning and Closing
Reach through the opening in the lining and turn the bag right side out. Carefully push out the corners. Fold in the raw edges of the opening in the lining and hand-stitch closed with a blind stitch.
Adding Closure
Attach your chosen closure (magnetic snap, button, or zipper) to the bag opening.
Pro Tips
- Pre-wash your fabrics: Prevents shrinking after the bag is sewn.
- Use a walking foot: Creates even quilting stitches and prevents fabric layers from shifting.
- Practice quilting on scrap fabric: Get comfortable with your chosen technique before quilting the bag exterior.
- Reinforce stress points: Strengthen handle attachments and corners for added durability.
- Experiment with different batting types: Adjust the loft to achieve your desired bag structure.
- Consider adding pockets: Interior or exterior pockets add functionality.
- Use quality interfacing: Provides structure and prevents the bag from sagging.
Professional Help

If you’re struggling with a particular step, consider seeking help from a local quilting shop or sewing instructor. A professional can offer personalized guidance and troubleshooting. Repairing damaged seams or handles can also be done by a professional tailor. Typical repair costs range from $20-$50 depending on the complexity of the repair.
FAQ
Q: What type of batting is best for a quilted bag?
A: Cotton batting provides a softer drape, while polyester batting offers more structure and is more resistant to wrinkles. A blend of both can offer the best of both worlds.
Q: Can I use fabric scraps for quilting?
A: Absolutely! Quilting is a great way to use up fabric scraps. Just make sure the scraps are relatively similar in weight and fiber content.
Q: How do I prevent my quilted layers from shifting while sewing?
A: Use plenty of pins or clips to secure the layers. A walking foot is also extremely helpful.
Q: What if my binding doesn’t mitre perfectly?
A: Don’t worry! A slight imperfection is often unnoticeable. You can use a small amount of steam to help shape the binding.
Alternative Solutions
If you find quilting too time-consuming, consider using pre-quilted fabric. This eliminates the quilting step and simplifies the process. You could also explore using heavier fabrics like canvas or denim for a more structured bag without quilting.
| Solution | Pros | Cons | Best For |
|---|---|---|---|
| Pre-Quilted Fabric | Saves time, easy to work with | Limited pattern options, can be expensive | Beginners, quick projects |
| Canvas/Denim | Durable, structured | Heavier, less drape | Everyday bags, sturdy designs |
Enjoy Your New Quilted Bag!
Congratulations! You’ve successfully sewn a beautiful quilted bag.
Here’s a recap of what you’ve learned:
* Selecting appropriate fabrics and batting
* Mastering quilting techniques
* Constructing the bag body and lining
* Adding finishing touches like handles and closures
You should be proud of your creation! Don’t hesitate to experiment with different fabrics, patterns, and techniques to create even more unique quilted bags.
Share your finished bag with us in the comments below! We’d love to see what you’ve created.


