
Ever wished you had a stylish, sturdy bag for groceries, books, or everyday carry? Learning how to sew a sack bag is a fantastic beginner sewing project that’s both practical and rewarding. If you’re tired of flimsy plastic bags or constantly searching for a reliable tote, this guide will walk you through creating your own custom sack bag. We’ll start with a quick overview of the process, and then dive into detailed instructions to ensure your success.
This comprehensive guide will cover everything from choosing the right fabric and tools to step-by-step sewing instructions, finishing techniques, and even ideas for customization. By the end of this article, you’ll be confidently creating durable and attractive sack bags for yourself and as gifts!
What You’ll Need for Sewing a Sack Bag
| Item | Quantity | Specifications |
|---|---|---|
| Fabric | 1 yard | Medium-weight cotton, canvas, denim, or linen. 44/45″ wide is standard. |
| Scissors or Rotary Cutter & Mat | 1 | Fabric scissors or rotary cutter and self-healing mat |
| Straight Pins | 1 box | For holding fabric pieces together |
| Sewing Machine | 1 | With standard presser foot |
| Thread | 1 spool | Matching your fabric color |
| Seam Ripper | 1 | For correcting mistakes (essential!) |
| Iron & Ironing Board | 1 | For pressing seams |
| Measuring Tape or Ruler | 1 | For accurate measurements |
| Marking Tool | 1 | Fabric chalk or disappearing ink pen |
Preparing Your Fabric & Cutting the Pieces
Before you begin sewing, accurate fabric preparation is key.
Step 1: Washing & Ironing
Wash, dry, and iron your fabric. This prevents shrinkage after the bag is sewn and ensures accurate cutting.
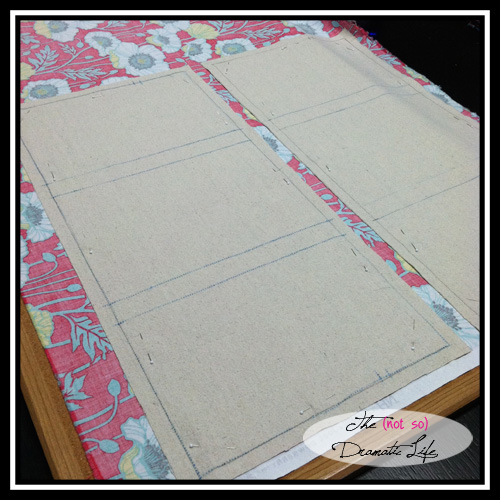
Step 2: Cutting the Fabric
You’ll need two rectangular pieces of fabric for the bag’s body, and two strips for the handles. Here are standard dimensions, but feel free to adjust for your desired bag size:
- Bag Body: 16″ wide x 18″ high (cut two)
- Handles: 3″ wide x 24″ long (cut two)
Use your measuring tape and marking tool to accurately mark these dimensions on your fabric. Cut the fabric with scissors or a rotary cutter.
Step-by-Step Sewing Process
Now, let’s get to the sewing!
Phase 1: Constructing the Bag Body
Step 1: Joining the Side Seams
Place the two bag body pieces right sides together. Pin along both sides. Using a ½” seam allowance, sew along each side. Backstitch at the beginning and end of each seam to secure the stitching.
Step 2: Finishing the Side Seams
To prevent fraying, finish the side seams. You can use a zigzag stitch, serger, or pinking shears.
Step 3: Creating the Bottom Seam
With right sides still together, fold the bag in half, aligning the bottom edges. Pin and sew across the bottom with a ½” seam allowance. Backstitch at the beginning and end. Reinforce the bottom corners with a small triangle stitch for extra durability.
Step 4: Finishing the Bottom Seam
Finish the bottom seam using your chosen method (zigzag stitch, serger, or pinking shears).
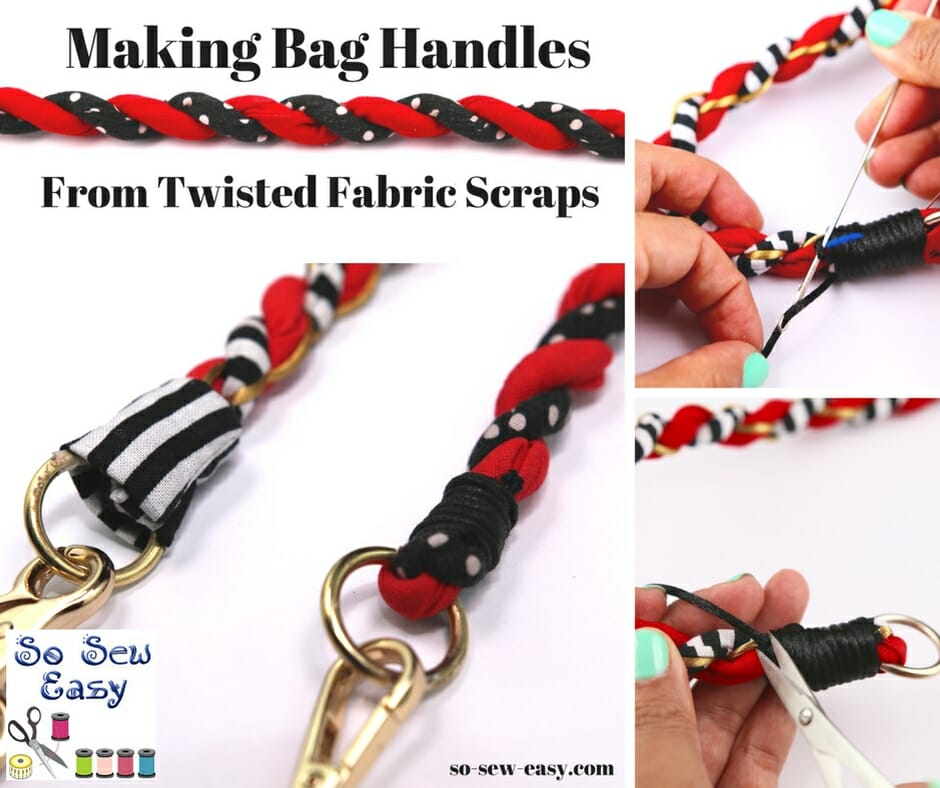
Phase 2: Creating and Attaching the Handles
Step 1: Preparing the Handles
Fold each handle strip in half lengthwise, wrong sides together, and press. Open the fold and fold each long edge towards the center crease. Press again. Fold along the original center crease to enclose the raw edges. Press one final time. This creates a neat, folded handle.
Step 2: Sewing the Handles
Topstitch along both long edges of each handle, about ⅛” from the edge. This secures the folded edges and adds a professional finish.
Step 3: Attaching the Handles to the Bag
Determine the placement of your handles. A good starting point is 3-4 inches from each side seam. Pin the handles to the right side of the bag, ensuring they are securely attached. Sew the handles to the bag using a square or rectangular pattern for extra strength. Backstitch thoroughly.
Phase 3: Finishing Touches
Step 1: Turning Right Side Out
Turn the bag right side out. Use a point turner or chopstick to gently push out the corners.
Step 2: Pressing the Bag
Press the bag, paying attention to the seams and handles. This gives the bag a crisp, finished look.
Step 3: Top Hemming (Optional)
For a cleaner look, you can hem the top edge of the bag. Fold the top edge down ½” to the wrong side and press. Fold it down another ½” and press again. Stitch along the folded edge to create a neat hem.
Pro Tips for a Perfect Sack Bag
- Fabric Choice: Canvas and denim are incredibly durable, while cotton and linen offer a softer feel. Consider the intended use of your bag when choosing fabric.
- Reinforced Handles: For heavier items, consider using heavier-weight fabric for the handles or adding a layer of interfacing for extra support.
- Boxed Corners: To create a bag with a flat bottom, box the corners. This involves folding the bottom corners to create a triangle and sewing across them.
- Pattern Placement: If using a patterned fabric, carefully consider the placement of the pattern when cutting the fabric to achieve the desired look.
- Seam Allowance Consistency: Maintaining a consistent seam allowance throughout the project is crucial for a professional finish.
- Pre-Shrink Fabric: Always wash and dry your fabric before cutting to avoid shrinkage after sewing.
- Use a Walking Foot: If working with thicker fabrics like canvas or denim, a walking foot can help feed the fabric evenly through your sewing machine.
When to Seek Professional Help
While sewing a sack bag is a beginner project, here are some situations where professional help might be beneficial:
- Complex Fabric: If you’re working with a very thick or challenging fabric, a professional seamstress can ensure clean and durable seams.
- Pattern Alterations: If you want to significantly alter the pattern or add complex features, a professional can provide guidance and assistance.
- Machine Issues: If your sewing machine is malfunctioning, a repair technician can diagnose and fix the problem.
FAQ
Q: What size fabric do I need?
A: A standard yard of 44/45″ wide fabric is usually sufficient for a typical sack bag. However, the exact amount will depend on the size you want to make.
Q: Can I use a different seam allowance?
A: Yes, you can adjust the seam allowance, but be consistent throughout the project. A ½” seam allowance is recommended for beginners.
Q: How do I prevent the handles from stretching out?
A: Use a heavier-weight fabric for the handles, reinforce the attachment points with extra stitching, and consider adding interfacing.
Q: What kind of thread should I use?
A: All-purpose polyester thread is a good choice for most sack bag fabrics.
Enjoy Your New Sack Bag!
Congratulations! You’ve successfully sewn your own sack bag. Now you can enjoy a stylish, durable, and eco-friendly alternative to plastic bags.
Here’s a recap of what we covered:
* Gathering the necessary materials and tools
* Accurately cutting the fabric pieces
* Step-by-step sewing instructions for the bag body and handles
* Finishing touches for a professional look
Don’t be afraid to experiment with different fabrics, colors, and embellishments to create unique and personalized sack bags.
Share your finished sack bag with us in the comments below! We’d love to see your creations and hear about your sewing experience.


