
Are you looking for a quick, easy, and stylish way to carry your essentials? A sash bag, also known as a belt bag or fanny pack, is the perfect solution! If you’re tired of bulky purses or constantly searching for your phone, a handmade sash bag can be a game-changer. This guide will walk you through the process of sewing a simple yet functional sash bag, even if you’re a beginner.
This comprehensive guide isn’t just about the basics; we’ll cover fabric choices, detailed step-by-step instructions, customization options, and even tips for adding unique embellishments. By the end of this article, you’ll confidently create a beautiful and practical sash bag tailored to your style, and you’ll be equipped to make many more!
What You’ll Need for Sash Bag Sewing
| Item | Quantity | Specifications |
|---|---|---|
| Fabric | 1/2 yard | Cotton, linen, canvas, or a durable woven fabric. Consider a contrasting fabric for the lining. |
| Interfacing | 1/2 yard | Lightweight fusible interfacing to add structure. |
| Webbing | 60 inches | 1-inch wide nylon webbing for the strap. Adjust length to your preference. |
| D-Rings | 2 | 1-inch D-rings for attaching the strap. |
| Swivel Hook | 1 | 1-inch swivel hook for the bag closure. |
| Thread | 1 spool | Matching the fabric color. |
| Zipper | 8-10 inches | Optional, for a secure closure. |
| Scissors | 1 | Fabric scissors. |
| Rotary Cutter & Mat | 1 each | Optional, but helpful for precise cuts. |
| Iron & Ironing Board | 1 each | Essential for pressing seams. |
| Sewing Machine | 1 | Standard sewing machine. |
| Pins or Clips | 1 box/pack | For holding fabric layers together. |
| Measuring Tape/Ruler | 1 | For accurate measurements. |
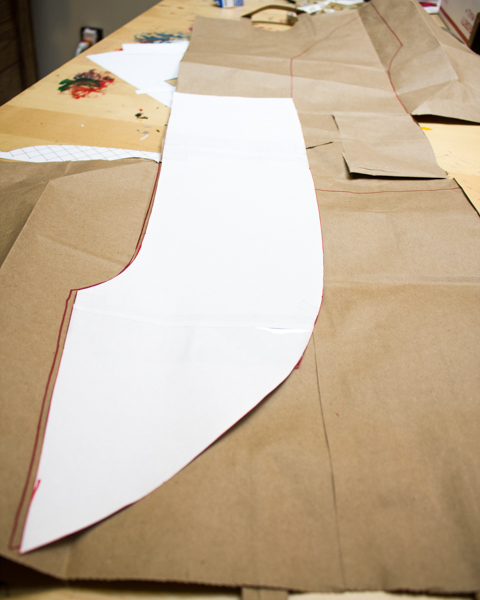
Preparing Your Fabric and Pattern
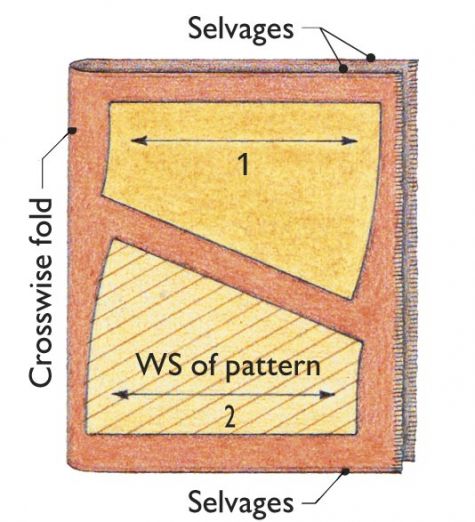
Cutting the Fabric
- Cut the Main Fabric: Cut two rectangles measuring 9 inches wide by 12 inches high.
- Cut the Lining Fabric: Cut two rectangles measuring 9 inches wide by 12 inches high.
- Cut the Interfacing: Cut two rectangles measuring 9 inches wide by 12 inches high.
- Optional Zipper: If using a zipper, cut the main fabric pieces slightly longer to accommodate the zipper insertion.
Applying the Interfacing
- Place the interfacing, fusible side down, onto the wrong side of each main fabric piece.
- Using an iron, fuse the interfacing to the fabric according to the manufacturer’s instructions. This will give your bag structure.
Step-by-Step Sash Bag Sewing Process
Phase 1: Constructing the Bag Body
- Sew the Main Fabric Pieces: Place the two main fabric pieces right sides together. Pin around the edges, leaving the top edge open.
- Sew the Seams: Sew around the pinned edges with a 1/2-inch seam allowance. Backstitch at the beginning and end of each seam to secure.
- Repeat for Lining: Repeat steps 1 and 2 with the lining fabric pieces, but leave a 4-inch opening on the bottom seam for turning.
Phase 2: Assembling the Bag
- Turn Right Side Out: Turn both the main fabric bag and the lining bag right side out.
- Insert Lining: Place the lining bag inside the main fabric bag, wrong sides together. Align the top edges.
- Topstitch: Pin the top edges together and topstitch around the entire top opening with a 1/4-inch seam allowance.
- Close the Opening: Carefully push the lining bag through the opening you left on the bottom seam. Gently smooth out the corners. Hand-stitch the opening closed with an invisible stitch.
Phase 3: Attaching the Strap and Hardware
- Attach D-Rings: Thread one end of the webbing through one D-ring, then fold it back on itself and stitch securely to create a loop. Repeat with the other end of the webbing and the second D-ring.
- Attach Swivel Hook: Thread the remaining webbing through the swivel hook and then through both D-rings. Adjust the length of the strap to your desired fit.
- Secure the Strap: Fold the end of the webbing back on itself and stitch securely to create a loop, ensuring the strap length is comfortable for wearing around your waist or across your body.
Pro Tips for a Perfect Sash Bag

- Fabric Choice Matters: Sturdier fabrics like canvas or denim will hold their shape better, while lighter fabrics like cotton are more comfortable.
- Reinforce Seams: Double-stitching key areas, like where the strap attaches, adds durability.
- Corner Precision: Carefully clipping the corners before turning the bag right side out helps achieve sharper, cleaner corners.
- Experiment with Closures: Instead of a swivel hook, consider using a magnetic snap or a button and loop for a different look.
- Personalize with Embellishments: Add embroidery, patches, or fabric paint to make your sash bag truly unique.
- Interfacing Weight: Use a heavier interfacing for thicker fabrics and a lighter interfacing for thinner fabrics.
- Strap Length: Measure your waist or hip to determine the ideal strap length before cutting the webbing.
Professional Help
If you’re struggling with a particular step or don’t have access to a sewing machine, consider:
- Local Tailor/Seamstress: A professional can complete the project for you or provide guidance.
- Sewing Classes: Many community centers and fabric stores offer sewing classes for all skill levels.
- Online Tutorials: YouTube and other platforms have a wealth of sewing tutorials.
Typical costs for professional alterations can range from $20-$50, depending on the complexity.
FAQ
Q: Can I use a different type of closure?
A: Absolutely! You can use a zipper, magnetic snap, button and loop, or even tie the bag closed with ribbon or cord.
Q: What if I don’t have interfacing?
A: While interfacing adds structure, you can omit it if you’re using a thicker fabric like denim or canvas.
Q: How do I adjust the strap length after it’s sewn?
A: You can carefully unpick the stitching at the strap end and adjust the length before re-sewing.
Q: I’m a beginner – is this project too difficult?
A: No! This is a great project for beginners. The straight lines and simple construction make it relatively easy to learn.
Alternative Solutions
If you find sewing daunting, consider these alternatives:
| Solution | Pros | Cons | Best For |
|---|---|---|---|
| Purchasing a Pre-Made Sash Bag | Convenient, wide variety of styles | Less customization, potentially lower quality | Those who want an instant solution |
| Upcycling an Old Bag | Eco-friendly, cost-effective | Requires some disassembly and modification | Those who enjoy repurposing items |
Enjoy Your New Sash Bag!
Congratulations on completing your handmade sash bag! You now have a stylish and practical accessory to carry your essentials.
Remember these key steps: careful fabric preparation, precise sewing, and secure attachment of the strap and hardware.
Share your creation with us in the comments below! We’d love to see your unique sash bag designs.


